
 Pin it
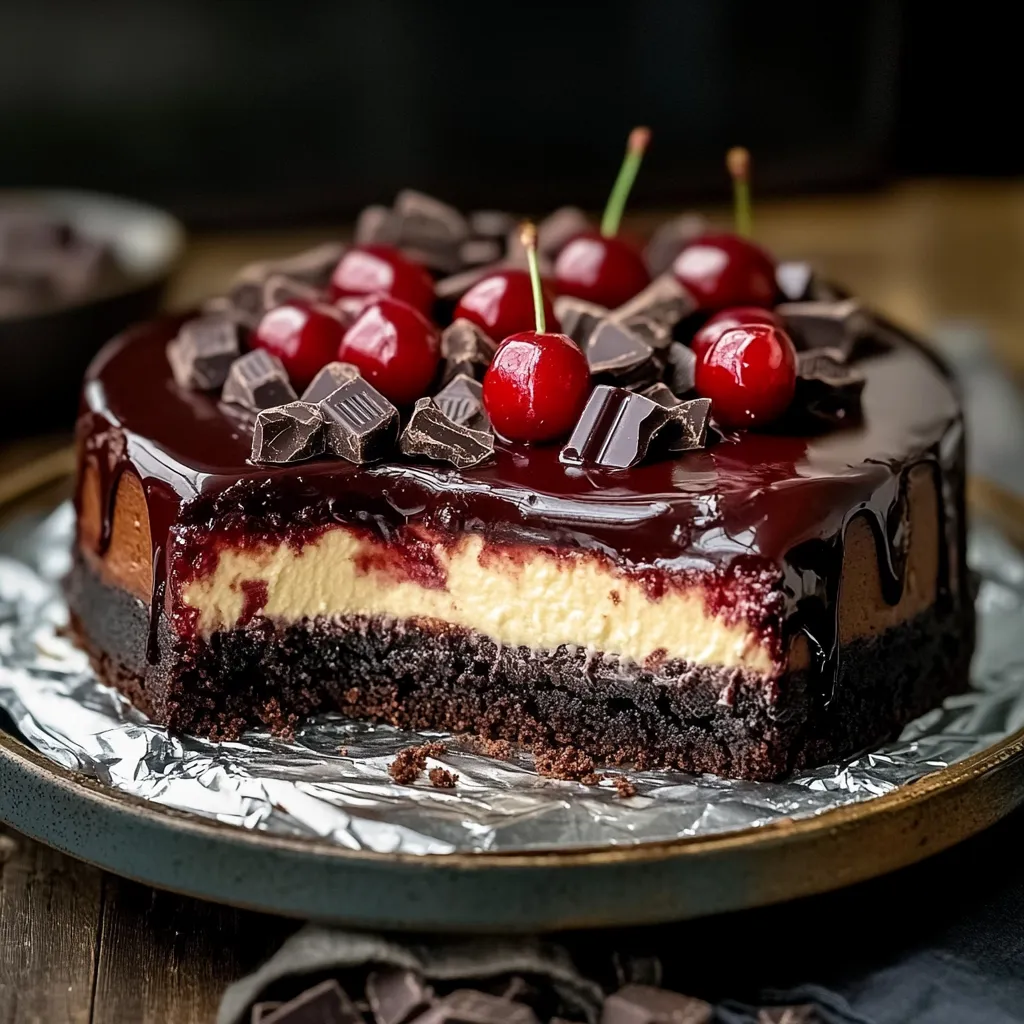
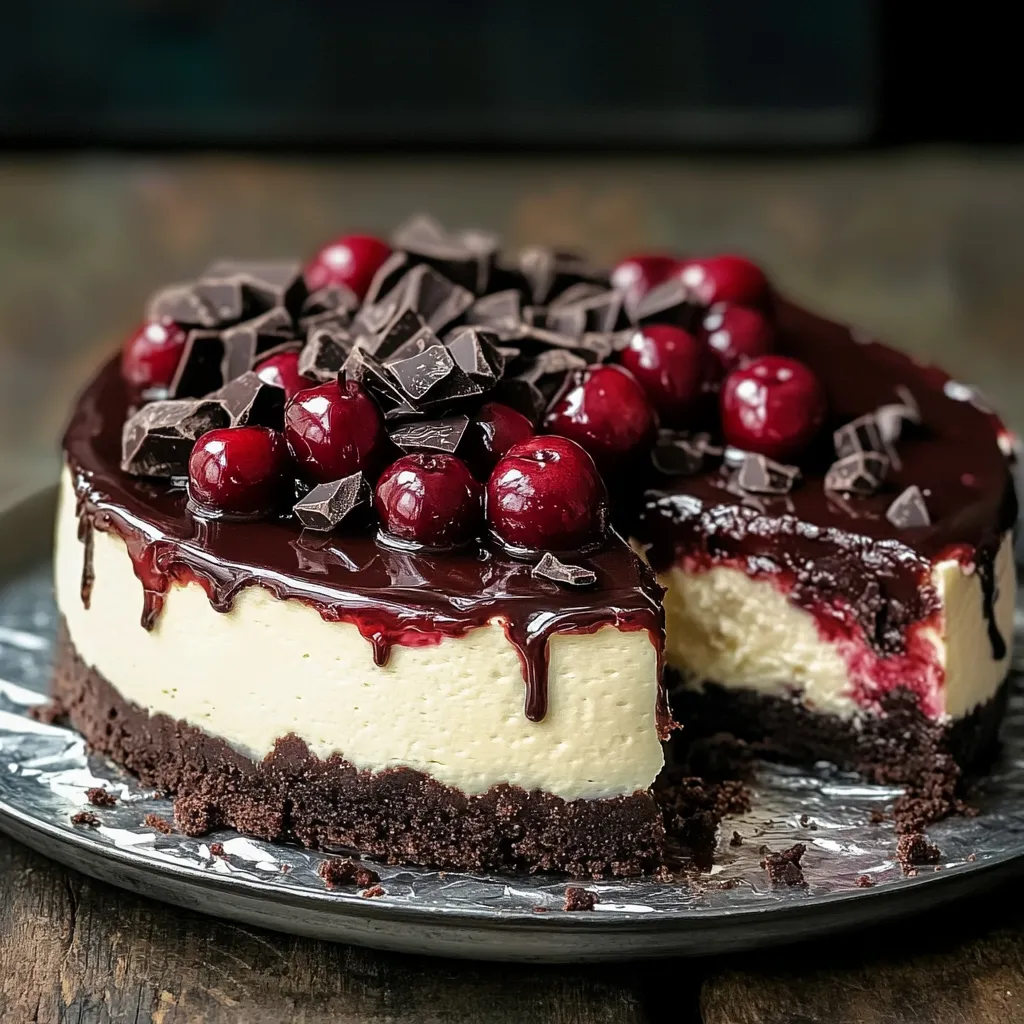
Velvety chocolate meets tangy cherries in this showstopping dessert that marries two beloved classics into one unforgettable experience. This Black Forest Cheesecake delivers intense chocolate richness through its cookie crust and cocoa-infused filling while bright cherry notes cut through the decadence with perfect tartness. Each forkful offers multiple texture experiences from the crisp chocolate base to the silky smooth filling and juicy cherry topping. This impressive creation elevates any gathering from ordinary to extraordinary, yet remains surprisingly approachable for home bakers seeking to create something truly memorable.
I discovered this combination during a holiday season when traditional Black Forest cake seemed too expected for our family gathering. The moment my uncle, who claims to dislike both cheesecake and cherries, requested a second slice, I knew this creation would become our new tradition. The contrast between the deep chocolate notes and vibrant cherries creates something entirely more sophisticated than either dessert alone, transforming ordinary ingredients into something truly extraordinary.
Essential Ingredient Selection
- Full-fat cream cheese: Provides unmatched richness and proper structure, never substitute reduced-fat versions.
- European-style butter: Contains higher butterfat percentage for superior flavor in the crust.
- Dutch-processed cocoa powder: Offers deeper chocolate color and smoother flavor than natural cocoa.
- Heavy cream: With minimum 36% fat content ensures proper consistency and luxurious mouthfeel.
- Fresh cherries: During summer months deliver bright flavor, though quality frozen cherries work beautifully year-round.
- Chocolate sandwich cookies: With cream filling create perfect crust texture without additional sugar.
Baking Method Instructions
- Creating chocolate foundation
- Process chocolate sandwich cookies into fine crumbs using food processor, maintaining consistent texture throughout. Combine thoroughly with melted butter until mixture resembles wet sand that holds shape when pressed. Using flat-bottomed measuring cup, press firmly and evenly into springform pan, creating slight rim up sides. Bake until set but not burned, approximately 10 minutes, then cool completely before filling.
- Developing silky texture
- Allow cream cheese to reach perfect room temperature, approximately 1 hour on counter, ensuring completely smooth filling without lumps. Beat until creamy before incorporating sugar gradually, which prevents graininess. Add eggs individually at medium-low speed, incorporating each fully before adding next, which maintains proper emulsion and prevents excess air incorporation.
- Achieving chocolate perfection
- Sift cocoa powder with flour to remove any lumps before adding to cream cheese mixture. This crucial step prevents dry pockets in finished cheesecake. Gradually incorporate heavy cream, which creates silky texture while enhancing chocolate flavor. Pour mixture over prepared crust, tapping pan firmly on counter several times to release trapped air bubbles.
- Mastering water bath technique
- Wrap springform pan thoroughly with heavy-duty aluminum foil, covering bottom and sides completely to prevent water seepage. Place in larger roasting pan and add hot water halfway up sides of cheesecake pan. This gentle, moist heat environment prevents cracking and ensures even baking throughout.
- Creating optimal texture
- Bake until edges appear set while center maintains slight jiggle when gently shaken, approximately 55 minutes. Avoid opening oven during baking, which causes temperature fluctuations. Turn off heat and leave cheesecake in oven with door cracked open for one hour, allowing gradual cooling that prevents surface cracks.
- Perfecting cherry topping
- Combine fresh cherries with sugar and lemon juice, simmering until cherries release juices and sauce thickens slightly. Cool completely before spooning over chilled cheesecake, as warm topping would melt surface. For professional presentation, arrange cherries in concentric circles starting from outside edge working inward.
 Pin it
My grandmother always emphasized the importance of patience when making cheesecake, insisting that proper cooling was as important as careful mixing. Following her wisdom, I discovered that allowing the cheesecake to cool gradually in the turned-off oven before refrigerating overnight truly transforms both texture and flavor development. When I rushed this process once for a last-minute dinner party, the difference was immediately noticeable, proving her culinary intuition correct yet again.
Temperature Control Secrets
Proper temperature management significantly impacts cheesecake success. Cold ingredients directly from refrigerator create lumps that never fully incorporate, while overheated chocolate can seize or separate. Maintain consistent oven temperature by using oven thermometer rather than relying on oven display, as many home ovens vary by 25°F from indicated temperature. When removing from refrigeration for serving, allow cheesecake to sit at room temperature for 20 minutes, which enhances flavor perception significantly.
Elegant Presentation
Serve individual slices on chilled plates drizzled with warm chocolate ganache that creates beautiful contrast against white plate. Garnish with fresh cherry with stem attached and small mint leaf for color variation. For special occasions, dust plate edges with cocoa powder using paper stencil for professional appearance. When serving larger gatherings, pre-slice entire cheesecake while cold using hot, clean knife wiped between each cut for pristine presentation.
Creative Adaptations
Transform this dessert for various dietary needs without sacrificing flavor. Create gluten-free version using gluten-free chocolate cookies for crust while maintaining other ingredients. Reduce sugar content by one-quarter without affecting texture, particularly when using naturally sweet cherries. For sophisticated adult variation, add two tablespoons kirsch liqueur to both filling and cherry topping, enhancing traditional Black Forest flavors. During winter holidays, incorporate subtle cinnamon and espresso powder into filling for warming complexity.
Storage Wisdom
 Pin it
Preserve freshness by storing undecorated cheesecake in refrigerator up to five days, covered tightly with plastic wrap after completely cooled. Apply cherry topping just before serving when possible for optimal texture contrast. For longer storage, freeze whole cheesecake or individual slices without toppings, wrapped first in plastic wrap then aluminum foil. Thaw overnight in refrigerator rather than room temperature for best texture maintenance.
Frequently Asked Questions
- → Can I make this Black Forest Cheesecake without a water bath?
- While a water bath helps prevent cracks and ensures even baking, you can skip it if needed. Instead, place a pan of water on the rack below your cheesecake to create moisture in the oven. Your cheesecake might crack on top, but the cherry topping will cover any imperfections.
- → Can I use fresh cherries instead of canned cherry pie filling?
- Yes! When cherries are in season, make your own topping by cooking 4 cups of pitted cherries with 1/2 cup sugar, 2 tablespoons cornstarch, and 2 tablespoons lemon juice until thickened. Cool completely before topping the cheesecake.
- → How do I prevent my cheesecake from cracking?
- To prevent cracks: use room temperature ingredients, don't overmix after adding eggs, bake in a water bath, avoid opening the oven during baking, and cool gradually in the turned-off oven with the door cracked. Even if it cracks, the cherry topping will hide it!
- → Can I make this Black Forest Cheesecake ahead of time?
- Absolutely! This cheesecake actually tastes better when made 1-2 days ahead. Prepare the cheesecake and refrigerate it covered. Add the cherry topping and whipped cream just a few hours before serving for the freshest presentation.
- → Is there a non-alcoholic substitute for the Kirsch?
- Yes, you can use 1 teaspoon of almond extract instead of Kirsch for that classic Black Forest flavor without alcohol. Cherry extract (1/2 teaspoon) also works well, or simply omit it altogether - the cheesecake will still be delicious.
- → How should I store leftover Black Forest Cheesecake?
- Store leftovers in the refrigerator, covered loosely with plastic wrap or in an airtight container, for up to 5 days. You can also freeze individual slices for up to 2 months - wrap them well in plastic wrap and then foil before freezing.