
 Pin it
Watching my mama make brioche donuts remains one of my most cherished childhood memories. We called them 'gogosi' in our home, a traditional Eastern European treat that filled our kitchen with the most intoxicating aroma. Mama never measured anything precisely—her measuring cup was whatever coffee mug happened to be clean at the moment. Somehow, they turned out perfect every time. Through years of practice, I've translated her intuitive approach into this measured recipe while preserving the authentic texture and flavor that made her gogosi so special. Consider this your ultimate guide to creating these pillowy, golden treasures in your own kitchen.
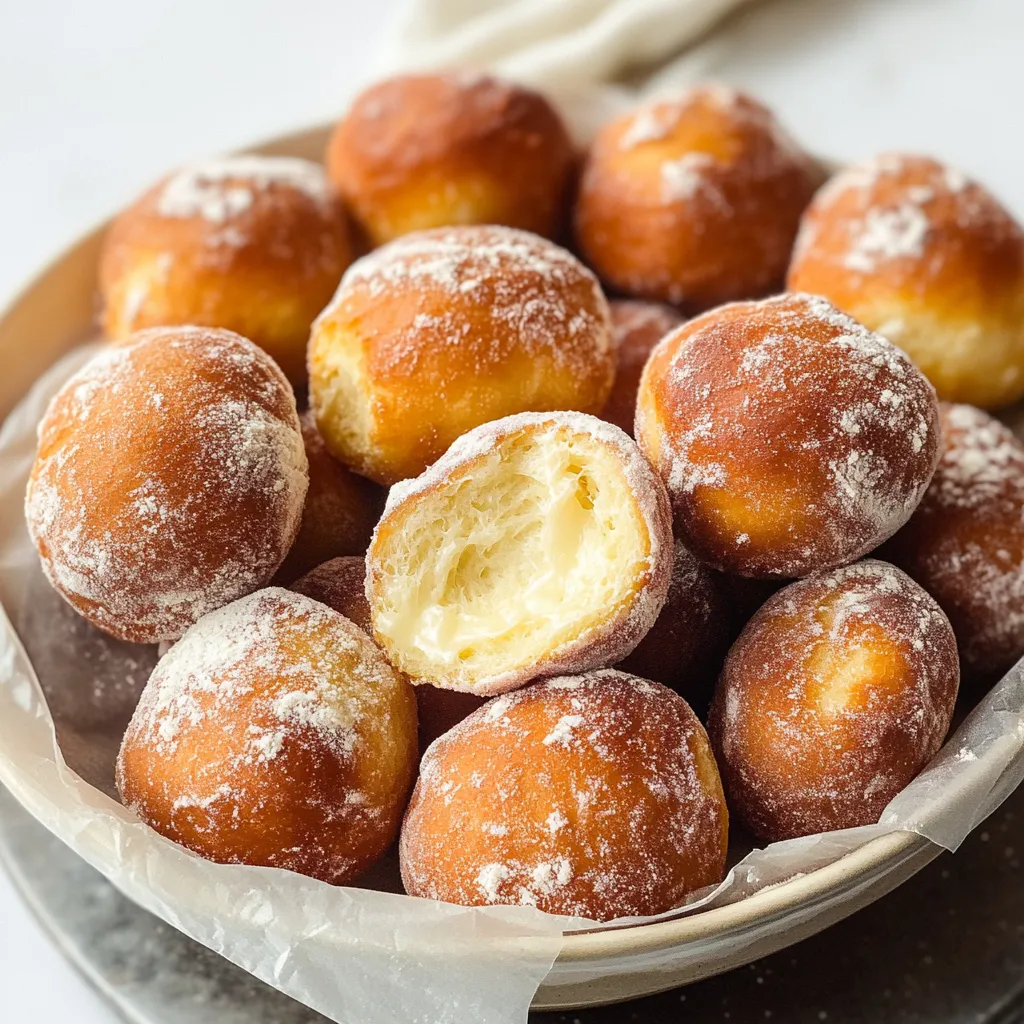
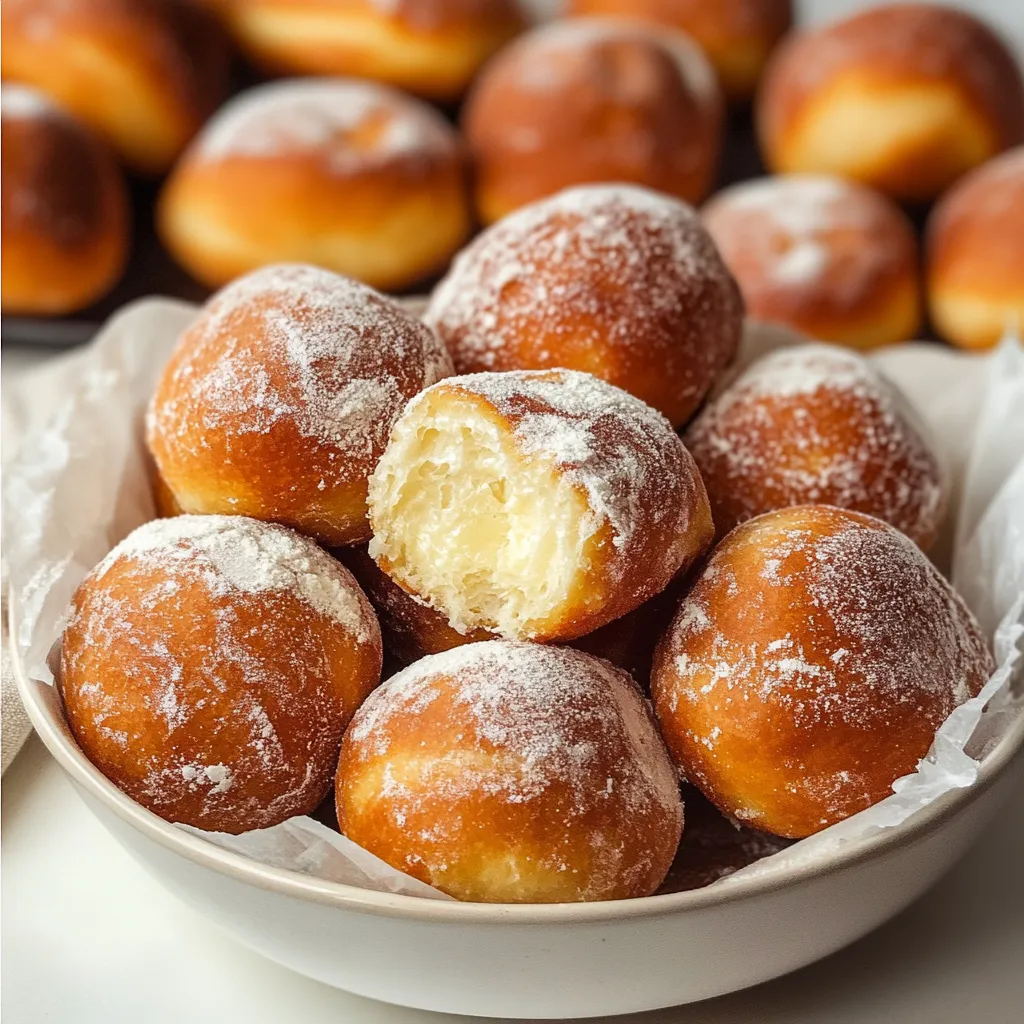
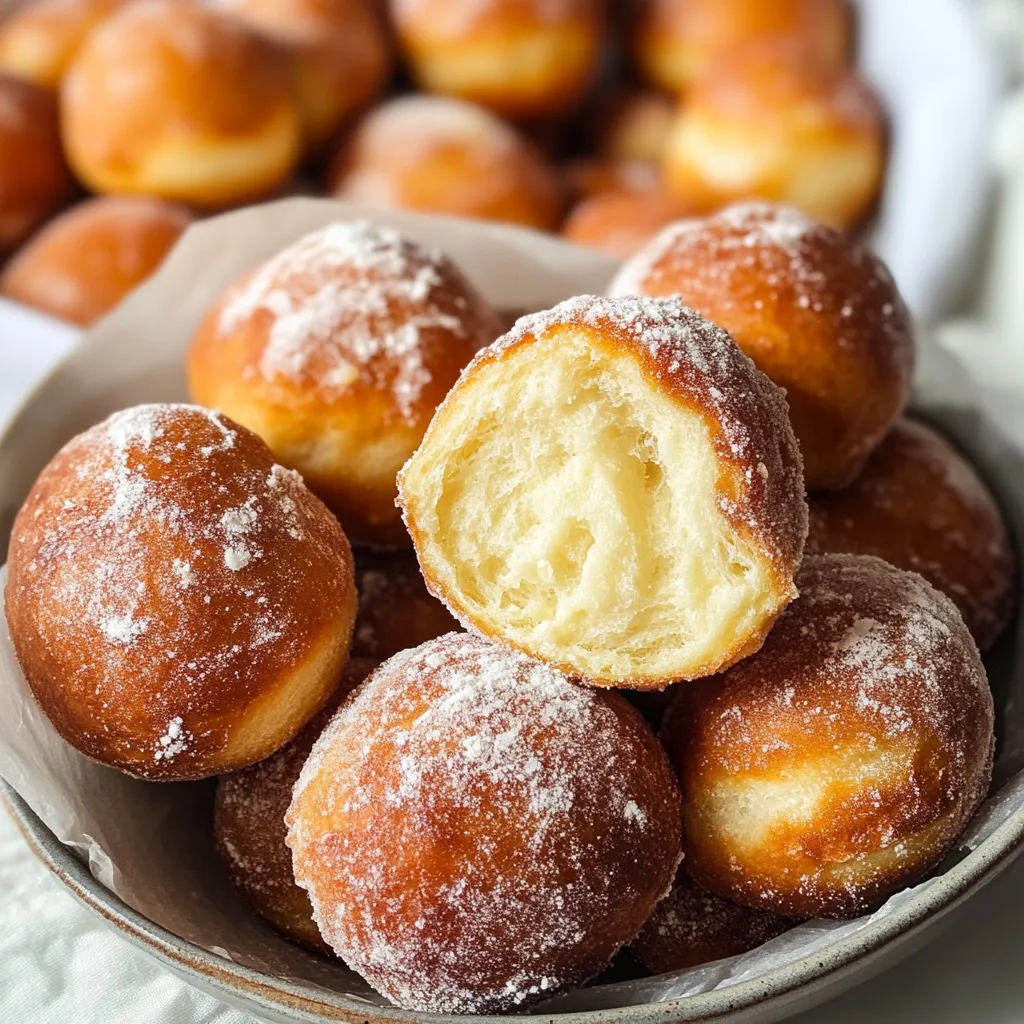
The first time I served these donuts to friends at a brunch gathering, nobody believed they were homemade. Several people insisted I must have purchased them from an upscale bakery and was trying to trick them. The texture truly is that professional—pillowy soft inside with that distinctive slight chew that marks a properly made brioche.
Understanding Brioche
- Enriched dough foundation: Creates that distinctive tender texture through generous addition of eggs, butter, and milk.
- Higher fat content: Compared to standard bread dough, gives brioche its characteristic richness and soft crumb.
- Extended kneading process: Develops the gluten structure needed to support all those enriching ingredients.
- Longer proofing time: Allows flavors to develop fully while yeast creates perfect aeration.
- Lower protein flour: Works best for achieving that delicate, pillowy texture we associate with premium donuts.
Yeast Wisdom
- Instant yeast: Provides reliable performance without requiring activation in liquid first.
- Active dry yeast: Works equally well but requires blooming in warm milk before adding to dry ingredients.
- Fresh yeast: Delivers exceptional flavor but requires careful handling and appropriate conversion ratios.
- Temperature sensitivity: Yeast needs warmth to thrive but will die at temperatures above 120°F.
- Proper storage: Keeping yeast in airtight containers in the refrigerator or freezer extends shelf life significantly.
Donut Creation
- Prepare Your Space:
- Begin by organizing your workspace with two key stations: a mixing area with a scale, stand mixer, and measured ingredients, and a proofing spot in the warmest part of your kitchen.
- Build The Foundation:
- Combine flour, sugar, salt, and instant yeast in your mixer bowl, whisking gently to distribute everything evenly.
- Introduce Wet Elements:
- Slowly add warm milk, followed by lightly beaten eggs, mixing until combined before incorporating butter.
- Transform With Butter:
- Add room temperature butter one tablespoon at a time, kneading for a full 8-10 minutes until dough becomes smooth and shiny.
- Test For Readiness:
- Perform the windowpane test to ensure properly developed gluten before moving to the first rise.
 Pin it
My absolute favorite aspect of these donuts is their versatility. While my mama always filled them with homemade plum jam, I've experimented with countless variations. My children adore them filled with Nutella or vanilla pastry cream, while my husband prefers them simply rolled in cinnamon sugar while still warm.
Temperature Matters
Maintaining proper oil temperature is crucial. Too cool, and they absorb excess oil, becoming greasy and heavy. Too hot, and they brown too quickly while remaining doughy inside. A reliable candy thermometer is essential for keeping oil at 350°F to 355°F.
Filling Techniques
Use a piping bag fitted with a long, narrow metal tip for evenly distributing filling. Insert from the side and squeeze gently while slowly withdrawing the tip. Slightly warming thick fillings like pastry cream can improve flow.
Sugar Coating Secrets
Roll donuts in sugar while still warm but not hot to ensure proper adhesion. For cinnamon sugar, allow them to cool slightly before coating. Experiment with vanilla sugar or a hint of cardamom for unique flavor twists.
Storage Solutions
Brioche donuts taste best fresh but can be stored at room temperature in a paper bag for short periods. For filled donuts, refrigeration is necessary after a few hours. Freezing unfilled donuts works well—simply warm them before serving.
 Pin it
The secret to exceptional brioche donuts lies in understanding the feel of properly developed dough. With time and practice, you’ll instinctively know when it's ready, just as my mama did. Even if I use measuring cups now, her spirit lives on in every batch I make.
Frequently Asked Questions
- → Can I make the dough ahead of time?
- Yes, you can prepare the Brioche Donut dough the day before. After the first rise (bulk fermentation), punch down the dough, cover it tightly with plastic wrap, and refrigerate overnight. The cold temperature slows down yeast activity but still allows for flavor development. The next morning, remove the dough from the refrigerator, let it sit at room temperature for about 30 minutes, then shape, proof, and fry as directed in the recipe. This make-ahead method can actually improve flavor complexity.
- → Why did my donuts deflate when I put them in the oil?
- Deflating donuts usually happen for two main reasons. First, your donuts might be overproofed - when left to rise too long, the yeast creates too much gas, weakening the gluten structure and making them collapse when disturbed. Second, the oil temperature might be too low. For perfect Brioche Donuts, maintain oil between 350-355°F and avoid dropping the dough from a height - instead, gently slip them into the oil. Also, only proof the donuts until they're puffy but still slightly firm when poked - a slow spring back is ideal.
- → Can I fill these brioche donuts?
- Absolutely! These Brioche Donuts make an excellent base for fillings. After they've cooled slightly but are still warm, use a small paring knife to create a hole in the side, or use a piping tip to create an opening. Fill a piping bag with your favorite filling - pastry cream, jam, Nutella, or lemon curd are all delicious options. Insert the tip into the hole and gently squeeze to fill the center cavity. If filling your donuts, you might want to skip the sugar coating or use powdered sugar instead for a less messy eating experience.
- → What's the difference between brioche donuts and regular donuts?
- Brioche Donuts are richer and more bread-like than standard cake or yeast donuts. The dough contains a higher percentage of butter and eggs, giving them a more tender, fluffy interior with an almost custard-like quality when fresh. Regular yeast donuts typically use less fat and have a lighter texture, while cake donuts use chemical leaveners instead of yeast for a denser crumb. Brioche donuts also have a subtle buttery flavor that makes them delicious even without glazes or fillings, though they pair beautifully with both.
- → Why is my dough too sticky to work with?
- Sticky Brioche Donut dough can happen for several reasons. First, humidity in your kitchen affects flour's moisture absorption - on humid days, you might need up to ¼ cup more flour. Second, undermixing prevents proper gluten development that firms up the dough. Make sure to mix for the full 8-10 minutes. Third, if your butter was too warm or melted when added, it won't properly incorporate. The dough should be tacky but not stick to your fingers in globs. If it's too sticky, add flour a tablespoon at a time during mixing until it reaches the proper consistency.