
 Pin it
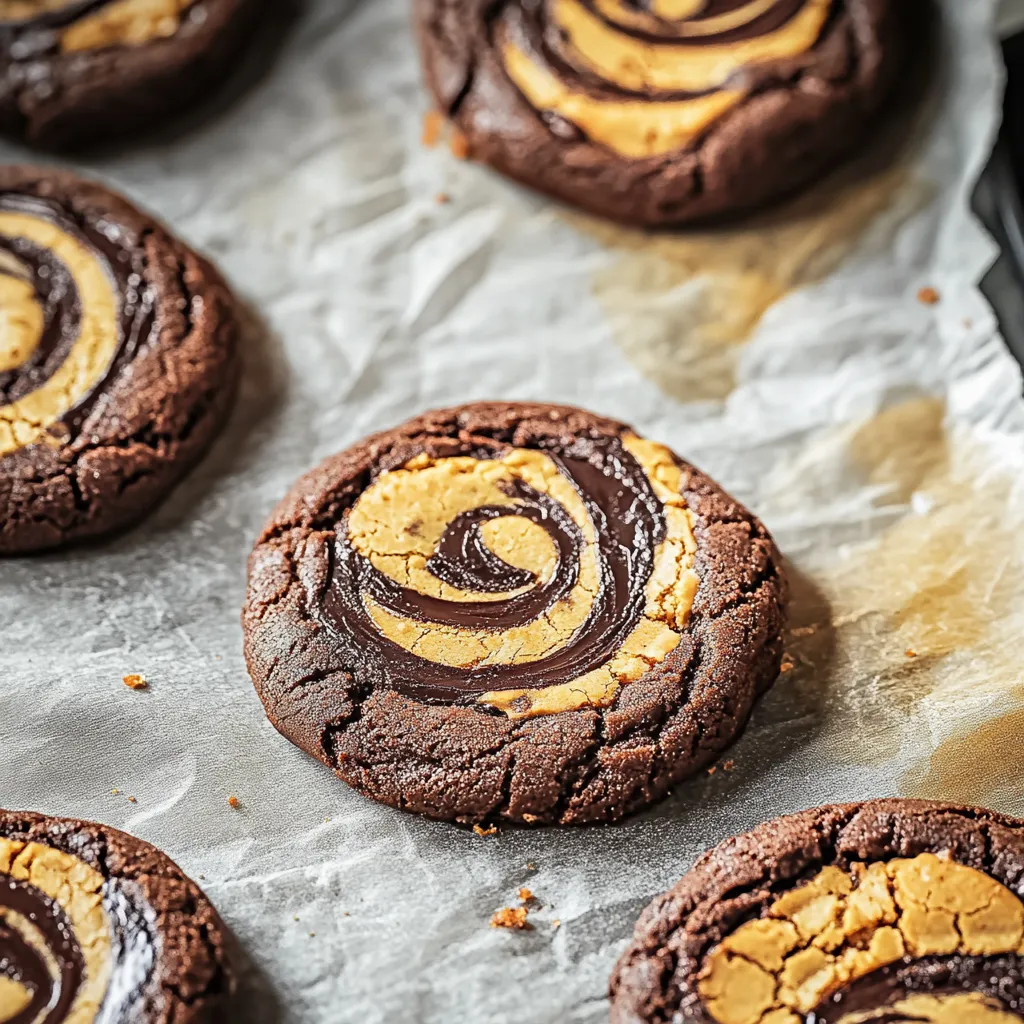
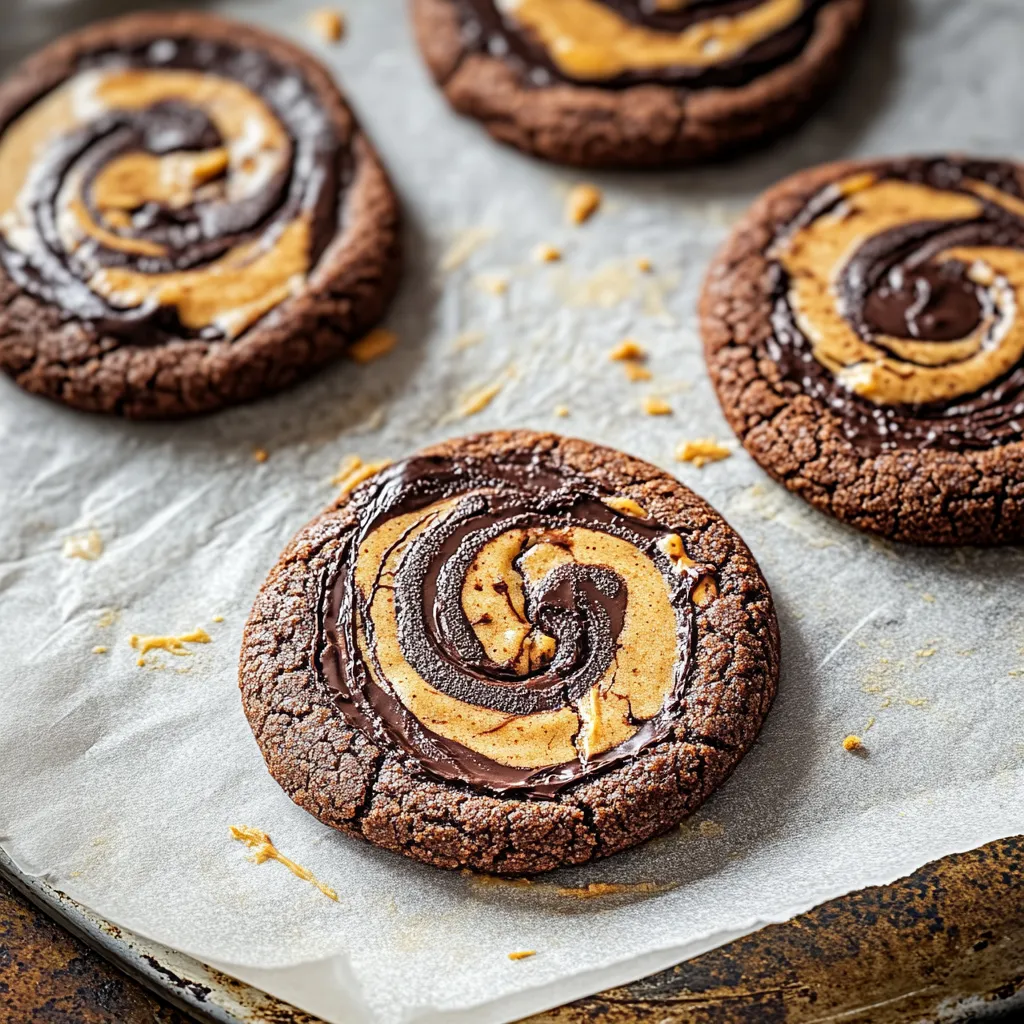
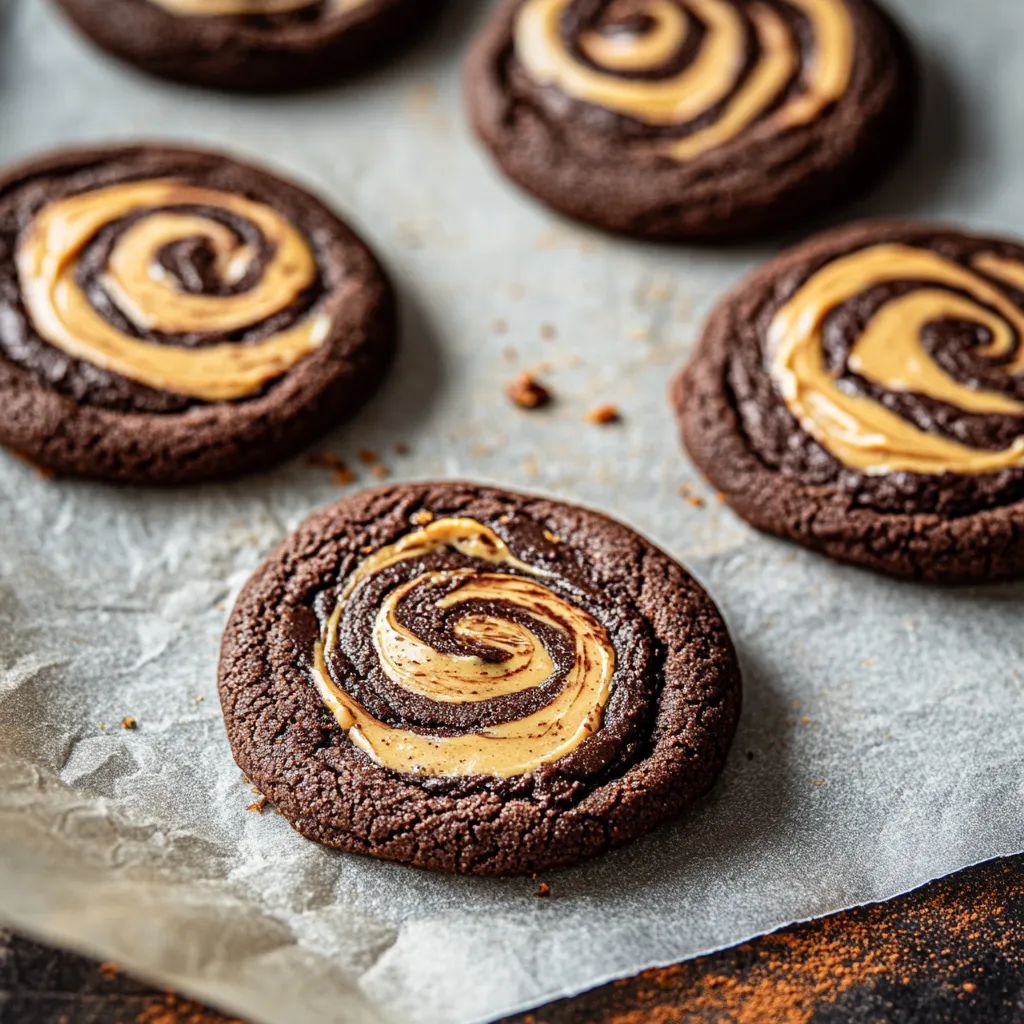
This decadent chocolate peanut butter swirl cookie recipe transforms simple pantry staples into an irresistible treat that satisfies both chocolate lovers and peanut butter enthusiasts. The dramatic marbled effect creates cookies that are as beautiful as they are delicious, making them perfect for special occasions or everyday indulgence.
I first developed these cookies during a rainy weekend when my niece and nephew were visiting. What started as a kitchen distraction has become our special tradition whenever they come over, with the kids always eager to help create the perfect swirls.
Ingredients
- All purpose flour: Builds the foundation for these cookies without overwhelming the star flavors
- Unsweetened cocoa powder: Provides deep chocolate flavor; use Dutch processed for even richer taste
- Baking soda: Ensures the perfect rise and texture
- Salt: Enhances all flavors and balances sweetness; always use fine sea salt if available
- Unsalted butter: Creates tenderness; let it sit at room temperature for at least an hour
- Granulated sugar: Provides sweetness and helps create crisp edges
- Brown sugar: Adds moisture and subtle caramel notes; use dark brown for more pronounced flavor
- Large egg: Binds everything together; room temperature works best
- Vanilla extract: Enhances both chocolate and peanut butter flavors; use pure, not imitation
- Creamy peanut butter: Creates those beautiful swirls; natural varieties work but avoid the completely unstirred ones
Step-by-Step Instructions
- Prepare the Chocolate Dough:
- Whisk your dry ingredients thoroughly to avoid cocoa powder lumps. In your stand mixer or with a hand mixer, cream the butter and sugars until truly light and fluffy, about 3 minutes. This step incorporates air into the dough for the perfect texture. Add the egg and vanilla, mixing until just combined. Gradually add your dry ingredients in 2 to 3 batches, mixing on low speed until no flour streaks remain. Avoid overmixing, which can make your cookies tough.
- Create Perfect Swirls:
- Warm your peanut butter slightly in the microwave for 10 seconds if it's cold; this makes it easier to swirl. Drop spoonfuls of peanut butter across the surface of your chocolate dough, using about half the amount. With a butter knife or wooden skewer, make gentle figure eight motions to create marbled patterns. The key is restraint here; less mixing creates more distinct and beautiful swirls.
- Chill for Success:
- Cover your bowl with plastic wrap, pressing it directly onto the dough surface to prevent drying. Refrigerate for at least one hour, though overnight is even better. This chilling time allows flavors to meld and prevents excessive spreading during baking. If chilled longer than 3 hours, let the dough sit at room temperature for 10 minutes before scooping.
- Baking Perfection:
- Preheat your oven completely before baking; this ensures even cooking. Line your baking sheets with parchment paper, not wax paper, for easy removal. Use a cookie scoop or tablespoon to portion dough, placing cookies about 2 inches apart. Watch carefully during baking; the cookies should look slightly underdone in the center when you remove them, as they will continue cooking on the hot baking sheet.
- Cooling Strategy:
- Let the cookies remain on the hot baking sheet for exactly 5 minutes; this allows them to set properly without overcooking. Transfer to a wire cooling rack to cool completely, about 20 minutes. The texture continues developing as they cool, so resist sampling immediately for the best experience.
 Pin it
The peanut butter swirl is what truly makes these cookies special. I discovered this technique accidentally when making brownies years ago, and now I use it for everything from cookies to quick breads. The way the peanut butter maintains its distinct flavor while complementing the chocolate base creates an irresistible combination that even self-proclaimed chocolate purists in my family cannot resist.
Make Ahead Options
The cookie dough can be prepared up to 3 days ahead and stored in the refrigerator, tightly wrapped. For longer storage, portion the dough into individual cookies, freeze on a baking sheet until solid, then transfer to freezer bags. These frozen dough balls can be baked directly from frozen; just add 2 minutes to the baking time. The texture actually improves with this method, producing even chewier centers with perfectly crisp edges.
Customization Ideas
These versatile cookies welcome creative variations. Try using crunchy peanut butter for added texture, or substitute half the vanilla extract with almond extract for a sophisticated flavor profile. For special occasions, press a chocolate kiss or peanut butter cup into the center of each cookie immediately after baking. During holiday seasons, add festive sprinkles to the tops before baking, or drizzle cooled cookies with melted white chocolate for an eye-catching finish.
Serving Suggestions
These cookies reach their peak flavor at room temperature, where both the chocolate and peanut butter notes fully develop. Pair them with cold milk for classic enjoyment, or with coffee for an afternoon treat. For an elevated dessert experience, sandwich vanilla or coffee ice cream between two cookies and freeze briefly to create spectacular ice cream sandwiches. When presenting as gifts, stack cookies in alternating directions inside a clear cellophane bag tied with ribbon for a bakery-worthy presentation.
 Pin it
Once you master the swirl technique, these cookies will become a household favorite for every occasion.
Frequently Asked Questions
- → Why do I need to chill the cookie dough?
Chilling the dough for at least an hour helps prevent the cookies from spreading too much during baking, maintains the distinct swirl pattern, and allows the flavors to develop more fully. The cold dough also creates a better texture in the finished cookie with a tender center and defined edges.
- → Can I use crunchy peanut butter instead of creamy?
Yes, you can substitute crunchy peanut butter for creamy, but it will change the texture and swirl appearance. Crunchy peanut butter will add small peanut pieces throughout the cookies and may create a less smooth marbled effect, while adding a nice textural contrast.
- → How do I know when these cookies are done baking?
The cookies are done when the edges are set but the centers still appear slightly soft, typically after 10-12 minutes at 350°F. They will continue to firm up as they cool on the baking sheet. Overbaking will result in dry cookies rather than the desired soft, fudgy texture.
- → How do I create the perfect swirl pattern?
For distinct swirls, drop dollops of peanut butter over the chocolate dough, then use a knife or skewer to make gentle figure-eight or S-shaped motions. The key is to avoid overmixing - you want to create marbling while keeping the chocolate and peanut butter partially separate.
- → How should I store these cookies?
Store the cookies in an airtight container at room temperature for up to 5 days. For longer storage, they can be frozen for up to 3 months. Place parchment paper between layers to prevent sticking. Allow frozen cookies to thaw at room temperature before serving.
- → Can I make the dough ahead of time?
Yes, the dough can be made ahead and refrigerated for up to 3 days before baking. You can also form the dough into balls and freeze them on a baking sheet, then transfer to a freezer bag for storage up to 3 months. Bake frozen dough balls directly from frozen, adding 1-2 minutes to the baking time.