
 Pin it
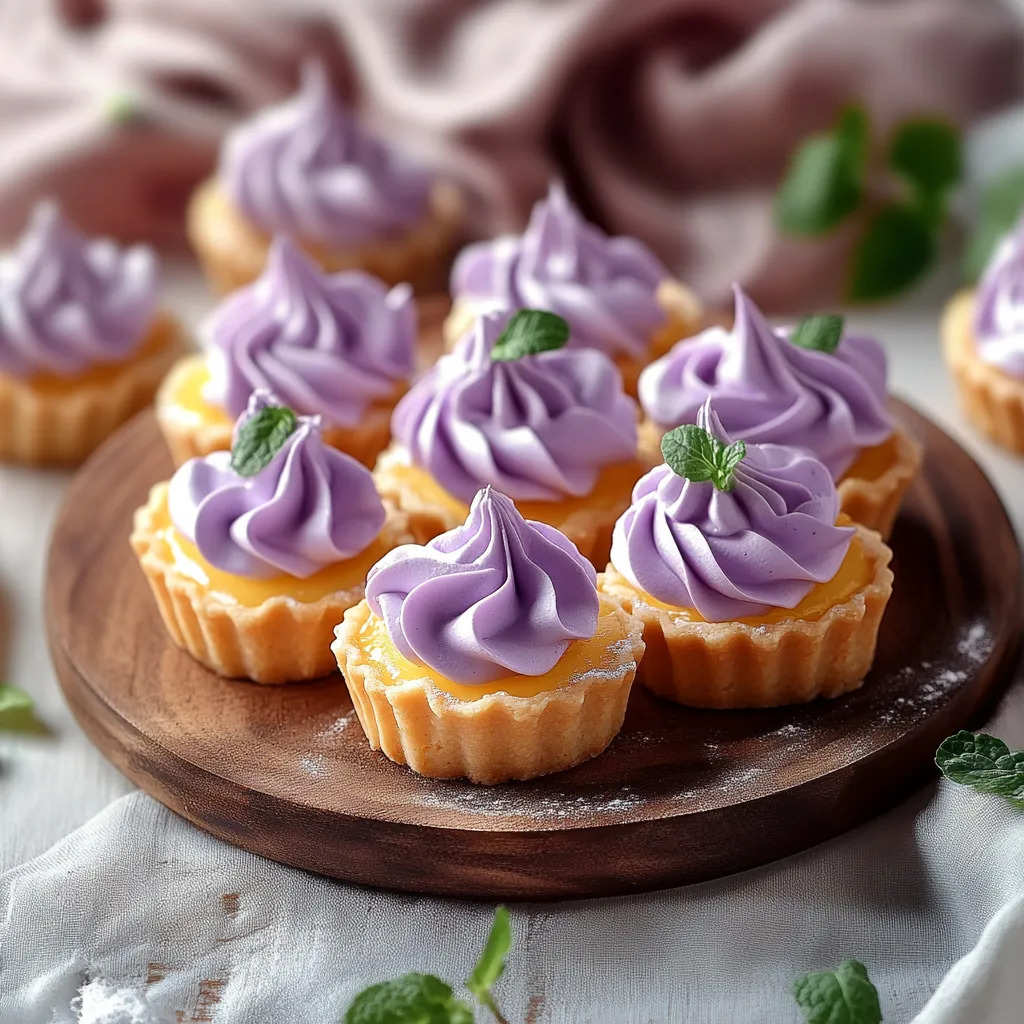
These delicate mini lemon tarts topped with cloud-like lilac meringue create the perfect balance of tangy and sweet. The buttery shortcrust pastry holds a bright lemon filling that awakens your taste buds while the dreamy purple meringue adds a touch of elegance that makes these tarts especially memorable for spring gatherings.
I first made these tarts for my sister's garden tea party last spring and the lilac meringue caused such a stir among guests that I now receive requests to make them for nearly every family celebration from Easter through summer.
Ingredients
- All-purpose flour: Creates a tender yet sturdy shell that holds up to the filling
- Unsalted butter: Chilled and cubed for the flakiest pastry texture
- Powdered sugar: Produces a more delicate sweetness in the crust than granulated
- Egg yolk: Adds richness and binds the pastry together
- Lemon juice: Fresh is non-negotiable for the brightest flavor
- Lemon zest: Contains essential oils that intensify the citrus flavor
- Granulated sugar: Balances the tartness of the lemon
- Eggs: Provide structure and richness to the filling
- Vanilla extract: Adds depth to the lemon filling
- Egg whites: Form the base for the fluffy meringue topping
- Lilac food coloring: Just a drop transforms these into showstoppers
- Fresh mint leaves: Offer a beautiful color contrast and hint of freshness
Step-by-Step Instructions
- Prepare the Tart Shell:
- Combine flour, powdered sugar, and salt in a large mixing bowl, whisking briefly to distribute ingredients evenly. Add the cold butter cubes and work them into the flour mixture using your fingertips or a pastry cutter until you achieve a texture like coarse sand with some pea-sized bits remaining. This varied texture creates flaky layers in the finished crust. Add the egg yolk and sprinkle in just enough cold water (usually 1-2 tablespoons) to bring the dough together. Roll the dough to about 1/8 inch thickness on a lightly floured surface, then use a round cutter slightly larger than your tart pans to cut circles. Gently press dough into mini tart pans, trim excess, and prick bottoms thoroughly with a fork to prevent bubbling. Refrigerate for a full 30 minutes to relax the gluten and firm the butter.
- Bake the Tart Shells:
- Preheat your oven to 350°F and position a rack in the center. Place the chilled tart shells on a baking sheet and bake for 15-20 minutes, watching carefully as mini tarts can go from perfectly golden to overbrowned quickly. Look for a light golden color across the surface and slightly darker edges. Remove from oven and allow to cool completely in the pans to prevent breakage.
- Make the Lemon Filling:
- In a medium saucepan, combine lemon juice, granulated sugar, whole eggs, lemon zest, and vanilla extract. Whisk thoroughly to break up the eggs completely before placing over medium heat. Cook the mixture slowly, whisking constantly to prevent any egg from scrambling. Watch as the mixture gradually thickens over 5-7 minutes until it coats the back of a spoon and a finger drawn through leaves a clear path. Remove from heat immediately and let cool for about 10 minutes, stirring occasionally to release heat. The filling will continue to thicken as it cools.
- Prepare the Meringue:
- Start with a completely clean and dry bowl as any grease or water will prevent proper whipping. Beat egg whites at medium speed until foamy, then increase to high speed as they begin to hold their shape. Gradually add sugar, about a tablespoon at a time, allowing it to incorporate before adding more. This slow addition ensures a stable meringue. Continue beating until the meringue forms stiff, glossy peaks that stand straight up when the beater is lifted. Add just a tiny drop of lilac food coloring and fold gently with a rubber spatula to maintain volume.
- Pipe the Meringue:
- Transfer your cooled lemon filling into the baked tart shells, filling each about three-quarters full. Spoon the meringue into a piping bag fitted with a star tip. Pipe decorative swirls or peaks onto each tart, making sure the meringue touches the crust all around to prevent shrinking. If you prefer a more rustic look, simply spoon the meringue and create peaks with the back of a spoon. Use a kitchen torch to carefully brown the meringue, moving constantly to achieve an even golden color without burning. Alternatively, place under a broiler for 1-2 minutes, watching constantly.
 Pin it
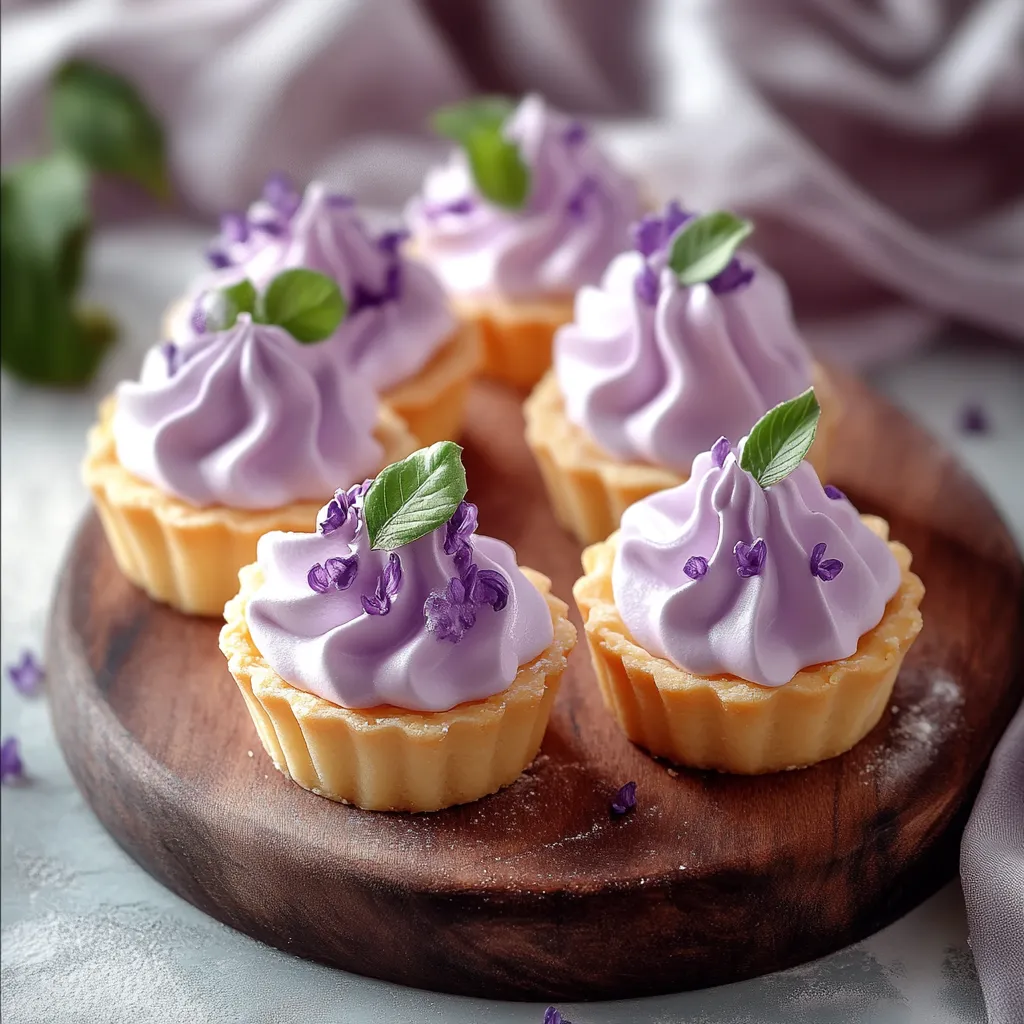
The lilac color of these tarts always reminds me of the flowering bushes that grew outside my grandmother's kitchen window. She taught me to make lemon curd when I was just eight years old, standing on a stool at her stove, and these tarts are a modern twist on that cherished memory.
Make-Ahead Options
These tarts can be prepared in stages if you're planning for a special event. The tart shells can be baked up to three days in advance and stored in an airtight container at room temperature. The lemon filling can be prepared one day ahead and refrigerated with plastic wrap pressed directly onto the surface to prevent a skin from forming. The meringue is best made fresh on the day of serving, but fully assembled tarts will hold their appearance and texture well for about 8 hours in the refrigerator.
Seasonal Variations
In summer, try adding a tablespoon of fresh blueberry puree to the meringue instead of food coloring for a natural purple hue and subtle berry flavor. For fall gatherings, a pinch of cinnamon in the crust and a sprinkle of candied lemon peel on top adds festive flair. During winter holidays, replace the vanilla in the filling with a half teaspoon of orange blossom water and garnish with sugared rosemary sprigs for an elegant presentation.
Serving Suggestions
These tarts shine as the star of an afternoon tea service alongside Earl Grey or jasmine tea. For dinner parties, pair them with a dessert wine like Sauternes or Moscato d'Asti. Create a stunning dessert table by arranging tarts in graduated heights on cake stands interspersed with fresh flowers that complement the lilac color theme. For an extra special touch, serve with a small scoop of vanilla bean ice cream on the side.
 Pin it
Mastering these mini lemon tarts will give you a signature dessert that friends and family will request time and again. The bright lemon filling and ethereal lilac meringue create a magical combination that looks like it came from a high-end patisserie but can be created right in your own kitchen with simple ingredients and a bit of patience.
Frequently Asked Questions
- → Can I make these mini lemon tarts in advance?
Yes, you can prepare the tart shells and lemon filling a day ahead. Store the shells in an airtight container and the filling covered in the refrigerator. Add the meringue just before serving for best results, as it can weep or lose volume over time.
- → What can I substitute for lilac food coloring?
If you don't have lilac food coloring, you can create a similar shade by mixing a tiny amount of blue and pink/red food coloring. Alternatively, leave the meringue white for a classic look, or use another pastel color that complements your presentation.
- → Do I need a kitchen torch to make these tarts?
While a kitchen torch gives you the most control for browning the meringue, you can also use your oven's broiler. Place the tarts on the top rack, leave the door slightly ajar, and watch them very carefully to prevent burning.
- → Can I use bottled lemon juice instead of fresh?
Fresh lemon juice provides the best flavor for these tarts. Bottled lemon juice often contains preservatives that can affect the taste. If you must use bottled, look for one without additives and consider increasing the amount of zest to enhance the lemon flavor.
- → How do I prevent my tart shells from shrinking while baking?
To prevent shrinkage, thoroughly chill the dough before baking (at least 30 minutes), use pie weights or dried beans on parchment paper during the first half of baking, and don't overwork the dough when mixing, which develops gluten and causes shrinkage.
- → How long will these mini lemon tarts stay fresh?
For the best texture and flavor, enjoy these tarts within 24 hours. The meringue will begin to break down after several hours, especially in humid environments. Store in the refrigerator if not serving immediately, but bring to room temperature before serving.