
 Pin it
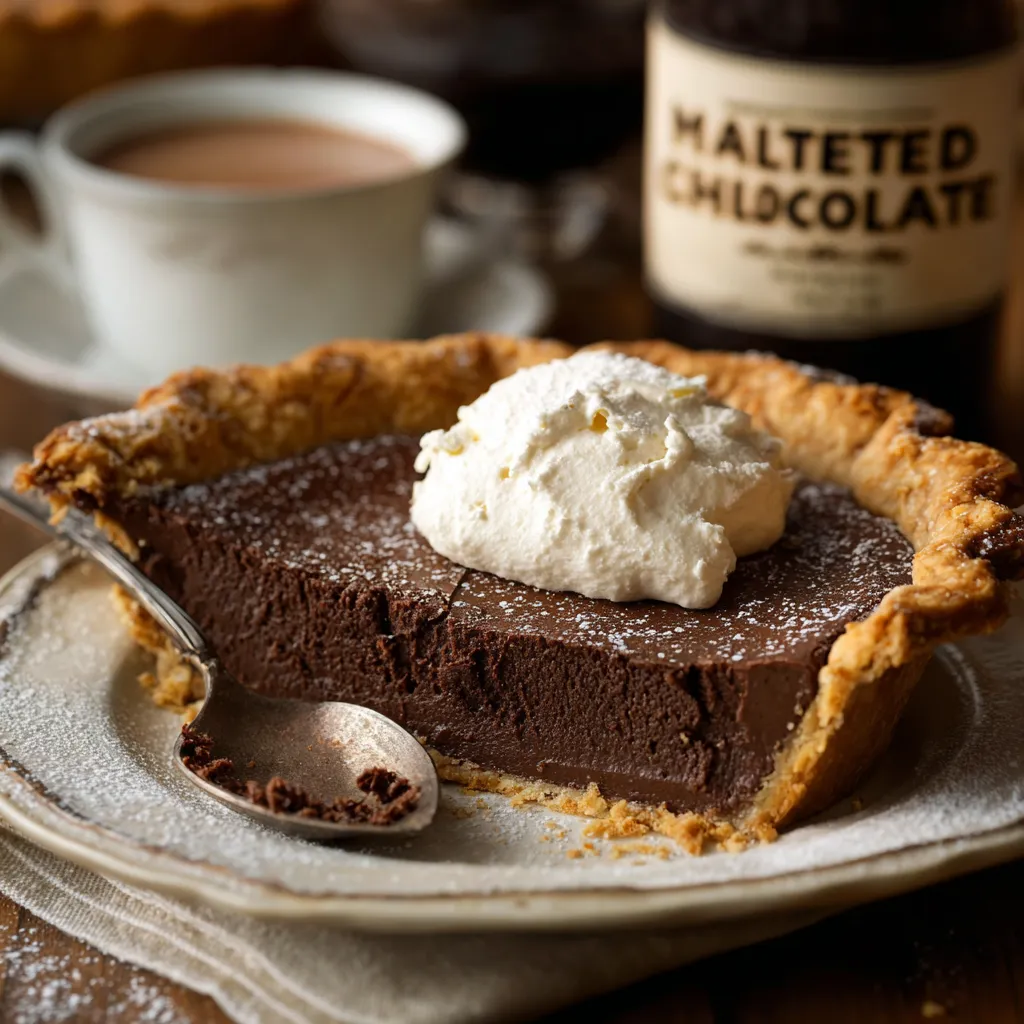
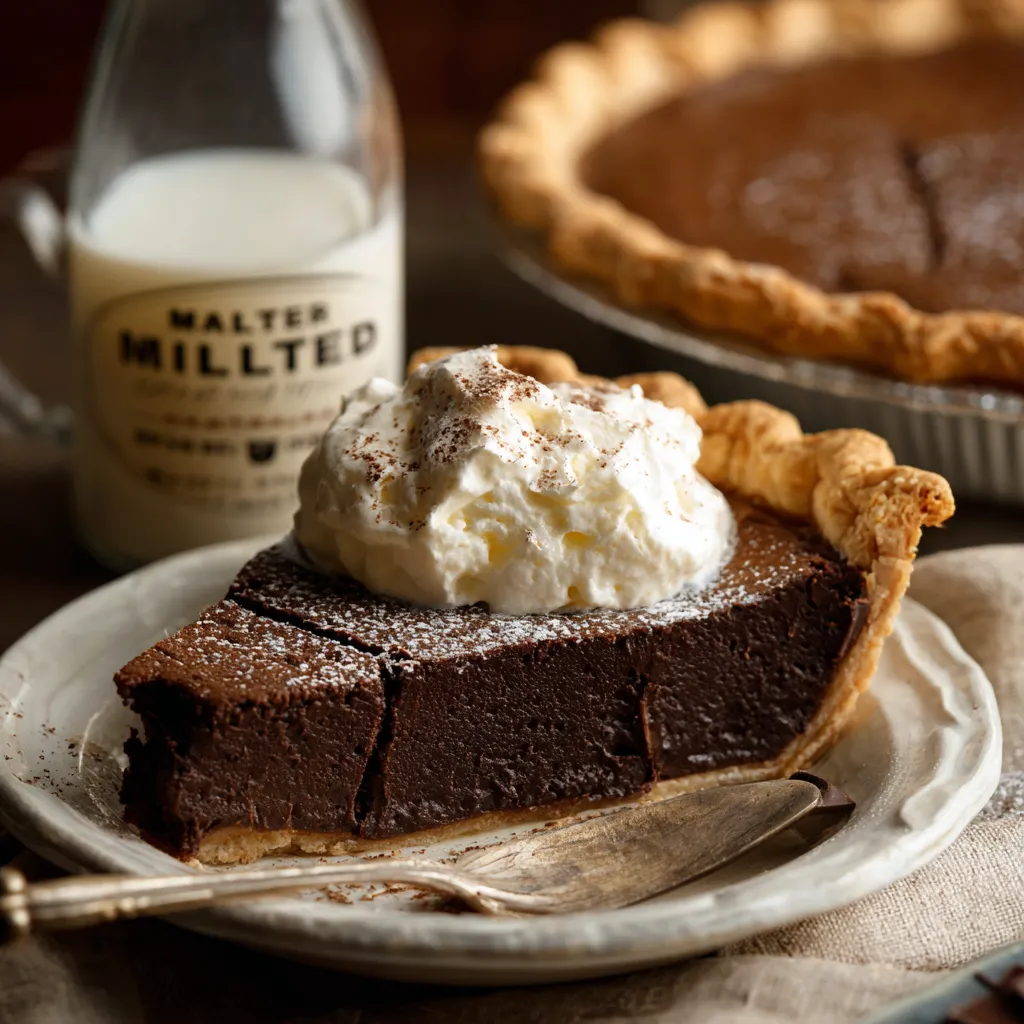
This Malted Chocolate Buttermilk Pie is a true celebration treat for anyone who craves nostalgia and deep chocolate flavor in every bite. Ovaltine and dark cocoa create a malty richness that reminds me of classic soda fountain desserts while tangy buttermilk and a flaky homemade crust keep each forkful irresistible. If you love the contrast of creamy smooth filling and crisp pastry, you are in for pure comfort food bliss.
I first baked this pie for a retro-themed birthday party and now it has become the secret request whenever family visits for Sunday suppers or casual celebrations. There is just something about the combination of malt and chocolate that invites second helpings and good conversation.
Ingredients
- Pie crust dough: Brings the essential flaky buttery base and can be prepped ahead for convenience
- Butter for crust and filling: Use high-fat European butter for maximum flavor
- Vegetable shortening: Helps achieve tender and crisp layers in the crust
- All-purpose flour: Binds everything together so sift for a lighter texture if possible
- Salt: Heightens flavors throughout both the crust and the filling
- Granulated sugar: Adds sweetness and assists browning look for fine white sugar
- Ice water: Keeps the crust tender and easy to roll work with very cold water only
- Eggs and egg yolk: Create structure and that velvety custard finish for the filling use large eggs at room temperature
- Chocolate malted Ovaltine: The star ingredient for extra malt and chocolate flavor
- Special dark cocoa: Deepens the pie’s color and taste use Dutch-processed for richer results
- All-purpose flour: Also helps thicken the filling slightly
- Melted butter: Ensures luxurious texture in the filling
- Buttermilk: Brings tang and creaminess pick whole buttermilk for best results
- Vanilla extract: Adds aromatic warmth to both components
- Heavy cream for whipped topping: Optional but highly recommended for a creamy finish use fresh cream for best whip
Step-by-Step Instructions
- Make the Dough & Freeze the Fats:
- Cut butter and shortening into small pieces and lay them out on a plate then place that plate into the freezer so both fats harden completely. This cold step is crucial for flaky crust.
- Prepare the Dry Mix:
- In your food processor, add flour, salt, and sugar. Pulse for just a few seconds to evenly combine and aerate the mixture.
- Incorporate Butter and Shortening:
- Toss the frozen fats into the processor. Pulse softly until the butter and shortening pieces are about the size of small peas. You want visible bits for flakiness.
- Hydrate and Shape the Dough:
- Add a quarter cup of ice water. Pulse a few times. Feel the dough and add up to two more tablespoons only if needed. Stop as soon as you can squeeze a handful and it stays together. Pour the crumbly dough onto a piece of plastic wrap, then use the wrap to pull the edges inward, gathering it neatly into a disk. Chill this wrapped dough in the fridge for at least thirty minutes so the gluten relaxes.
- Roll Out and Shape the Crust:
- Liberally flour your countertop and rolling pin. Take the cold dough and roll it out to a circle roughly two inches wider than your ten-inch pie plate. Place the dough into the pie plate and gently smooth down against the base and sides. Trim away excess then crimp or flute the edges using your fingers for a classic look. Any cracks can easily be patched with leftover scraps.
- Freeze and Blind Bake the Shell:
- Place the lined pie plate into your freezer for another thirty minutes. When ready, preheat your oven to four hundred degrees Fahrenheit. Fit a sheet of foil inside the crust and fill with pie weights or dried beans, making sure to support the edges. Bake for fifteen minutes to set the shape. Remove from the oven and carefully lift out the foil and weights. Keep the foil for later.
- Beat the Eggs:
- Using a stand mixer or hand mixer, place eggs and yolk in the bowl. Beat on medium speed for two minutes. They should become nicely pale.
- Beat in Sugar:
- Scrape the sides down if necessary. Add granulated sugar and beat for another two minutes until the mixture is glossy and thickened.
- Add Chocolate Ingredients:
- Sprinkle in the Ovaltine, dark cocoa, salt, and flour. Turn the mixer on low speed, pulse a few times, and mix gently to avoid any dust up.
- Finish the Batter:
- With the mixer on low, drizzle in melted butter, then buttermilk, then vanilla. Scrape down both the bowl and paddle to make sure everything is completely blended. Pour that luscious batter into your cooled pie shell.
- Bake the Pie:
- Rip your reserved foil to shield the outer pie edges so they do not darken or burn. Place the pie in the oven at four hundred degrees for fifteen minutes. Lower the temperature to three hundred fifty degrees and continue baking for thirty-five to forty minutes. The center should be just set but still jiggles slightly.
- Cool and Serve:
- Let the pie chill so the filling firms up. Whip your fresh cream until soft peaks form and serve generous dollops on top. The pie can be enjoyed slightly warm or cold depending on your mood.
 Pin it
When I was a kid the best part of making this pie was always licking the spatula after mixing in the Ovaltine. My younger brother and I would race to be first in line for the bowl. Now I share that moment with my own kids and it brings back all those sweet memories.
Storage Tips
This pie stores well tightly covered in the refrigerator for up to four days. I like to place a sheet of wax paper between the pie and foil to help keep that crust crisp. To freeze the pie wrap individual slices or a whole cooled pie securely in a double layer of plastic and foil. Thaw overnight in the fridge and rewarm gently or just enjoy chilled.
Ingredient Substitutions
You can swap out the Ovaltine for any malted milk powder you have on hand, but the classic flavor really is unique. For the cocoa powder, try using a good-quality Dutch process brand or natural unsweetened in a pinch. If you want a nondairy option, use coconut oil for butter and coconut cream for whipped topping.
Serving Suggestions
Serve thick slices with plenty of whipped cream or even a drizzle of warm chocolate sauce. Top with a handful of crushed malted milk balls for extra crunch. The pie is especially good slightly warm but I love it just as much straight from the fridge with a hot cup of coffee.
Cultural and Historical Context
Malted milk has been a treat in American desserts for generations, originally popularized by soda fountains and retro diners. This pie captures that throwback flavor and brings it to your family kitchen. Unlike many chocolate pies, the buttermilk gives it a Southern farmhouse twist that feels both homey and a little bit luxe.
 Pin it
This dessert brings nostalgic flavor to your table while being approachable for bakers of all skill levels. Enjoy!
Frequently Asked Questions
- → How do I make the crust extra flaky?
Use cold butter and shortening, chill your dough, and avoid overworking for maximum flakiness.
- → Can I substitute Ovaltine if unavailable?
Yes, use another chocolate malt powder or omit for a classic chocolate flavor.
- → What prevents the edges from overbaking?
Cover crust edges with foil strips while baking to avoid excessive browning.
- → Why does buttermilk work in this filling?
Buttermilk adds a gentle tang and helps create a creamy, custard-like texture.
- → How should it be served?
It's delicious warm or chilled, ideally topped with freshly whipped cream.