
 Pin it
This mini cotton cheesecake recipe creates the lightest, fluffiest individual cheesecakes you'll ever taste. Unlike traditional dense New York-style versions, these Japanese-inspired treats practically melt in your mouth with their soufflé-like texture and subtle sweetness that's never cloying. I discovered this technique during a culinary exchange program and have been perfecting it for my family ever since.
The first time I served these at a dinner party, my guests couldn't believe they weren't from a high-end bakery. Now my daughter insists on making them together every Sunday afternoon, carefully watching the cheesecakes rise like little clouds in the oven.
Ingredients
- Cream cheese: 200g crucial for that signature tangy base, ensure it's at room temperature for smoothest results
- Eggs: 3 separate them while cold, then let whites come to room temperature for maximum volume
- Heavy cream: 200ml provides richness and helps create that cotton soft texture
- Milk: 50ml lightens the batter slightly, whole milk works best for proper fat content
- Cake flour: 60g the lower protein content creates a more delicate crumb than all purpose flour
- Cornstarch: 10g further tenderizes the cake for that signature melt in your mouth quality
- Sugar: 120g superfine sugar dissolves more easily for a smoother texture
- Lemon juice: 1 tbsp brightens the flavor and helps stabilize the egg whites
- Vanilla extract: 1 tsp adds depth to the sweet notes, use pure extract for best flavor
Step-by-Step Instructions
- Prepare the Baking Pan:
- Line your mini cheesecake pans or muffin tins with parchment paper circles cut to fit the bottoms. Lightly grease the sides with butter or cooking spray. This preparation ensures clean removal after baking. For best results, use pans with removable bottoms if available. The careful preparation here prevents heartbreak when unmolding your delicate creations.
- Mix the Cheesecake Batter:
- Beat the cream cheese in a large bowl until completely smooth with no lumps whatsoever. This might take 2 to 3 minutes of continuous mixing. Gradually add sugar while beating until the mixture becomes lighter in color and texture. Pour in milk and heavy cream in a slow stream while mixing on low speed. Add egg yolks one at a time, incorporating each fully before adding the next. Sift the cake flour and cornstarch directly over the bowl and fold gently with a rubber spatula using a cut and fold motion until just combined. Overmixing at this stage will develop gluten and toughen your cheesecakes.
- Create the Fluffy Texture:
- In a separate clean, dry bowl, whip egg whites until foamy. Add lemon juice and continue beating until soft peaks form. Gradually add 2 tablespoons of the sugar reserved from the total amount while beating until stiff glossy peaks form. The whites should stand up straight when the beater is lifted. Using a rubber spatula, add one third of the whites to the cheese mixture and fold gently to lighten it. Add remaining whites in two additions, cutting down through the center and folding up and over with a light hand. Stop when just combined with minimal white streaks remaining. The batter should look light and airy like a cloud.
- Bake the Cheesecakes:
- Preheat oven to 325°F and position rack in the center. Spoon the batter into prepared pans about 3/4 full to allow room for rising. Tap the pans gently on the counter to remove large air bubbles. Place pans on a baking sheet and bake for 25 minutes until tops are light golden and centers still have a slight jiggle. Avoid opening the oven door during baking as temperature fluctuations can cause dramatic deflation. The cheesecakes will continue cooking from residual heat after removal from the oven.
- Cool and Serve:
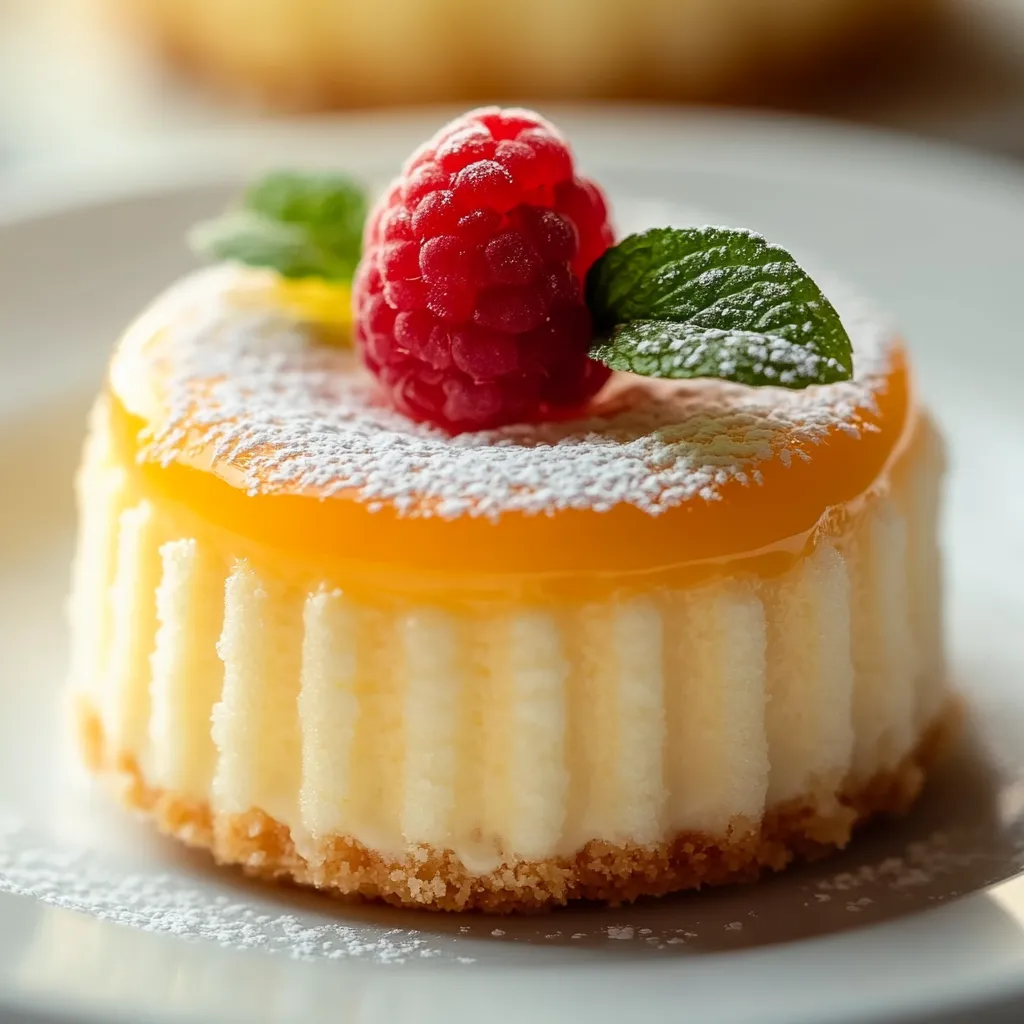
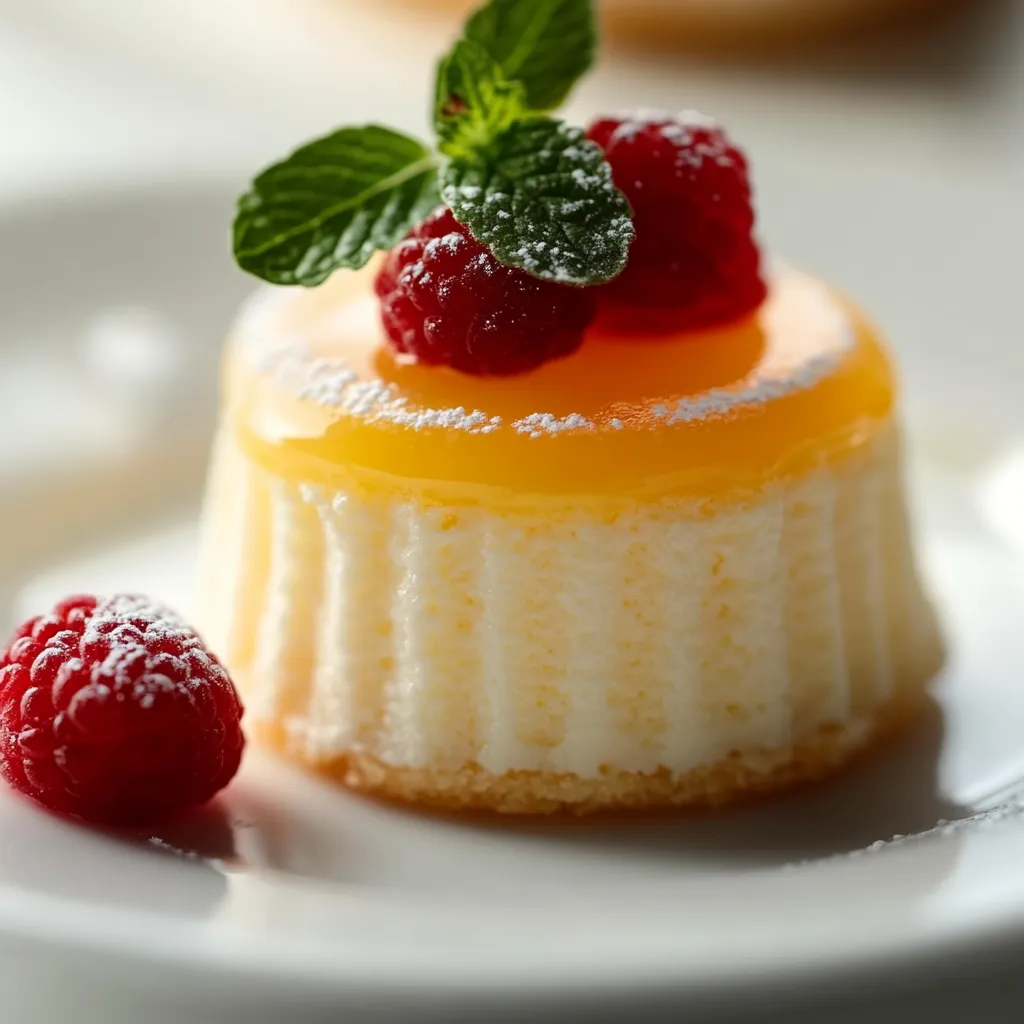
- Turn off the oven and crack the door open about 1 inch. Allow cheesecakes to cool gradually in the oven for 10 minutes to prevent drastic temperature changes that cause sinking. Remove from oven and run a thin knife around the edges to loosen. Let cool completely on a wire rack for 30 minutes before covering and refrigerating for at least 4 hours or overnight. The texture improves significantly with chilling time. Before serving, dust with powdered sugar or top with fresh berries for a simple elegant presentation.
 Pin it
The secret to the incredible texture lies in the proper folding technique of the egg whites. I learned this from my Japanese neighbor who insisted that counting your folding strokes helps maintain discipline. She taught me that 20 gentle folds is the magic number that preserves the air bubbles while fully incorporating the ingredients.
The Secret to Perfect Texture
The signature cotton soft texture of these cheesecakes comes from two critical techniques. First, the separation and proper beating of egg whites creates tiny air pockets throughout the batter. Second, the gentle folding preserves these air pockets which expand during baking to create that soufflé like texture. Be particularly careful not to overmix once the flour is added, as this activates gluten which can make your cheesecakes tough rather than tender. Room temperature ingredients also blend more completely, eliminating lumps and creating a smoother final product.
Storage and Make-Ahead Tips
These mini cotton cheesecakes store beautifully in the refrigerator for up to three days. Keep them in an airtight container to prevent them from absorbing other food odors. For the best texture, remove them from the refrigerator about 15 minutes before serving to take the chill off. They can also be frozen for up to one month. To freeze, place them on a baking sheet until solid, then wrap individually in plastic wrap and place in a freezer bag. Thaw overnight in the refrigerator before serving.
Seasonal Variations
Spring version. Top with fresh strawberries and mint leaves for a bright seasonal flavor. Summer offering. Pair with macerated peaches or nectarines tossed with a touch of honey. Fall favorite. Add a warm spiced apple compote with cinnamon and nutmeg. Winter delight. Create a citrus topping with blood oranges and a drizzle of warm chocolate.
 Pin it
Enjoy this cloud-like dessert that impresses everyone with its elegance and simplicity.
Frequently Asked Questions
- → Why is it called cotton cheesecake?
It's called cotton cheesecake because of its exceptionally light, fluffy texture that resembles cotton. This texture comes from whipping egg whites separately and gently folding them into the batter, creating a soufflé-like consistency that's much lighter than traditional cheesecakes.
- → What's the difference between regular and cotton cheesecake?
Regular cheesecake has a dense, creamy texture and often features a graham cracker crust. Cotton cheesecake is much lighter and airier, more like a soufflé, contains less cream cheese, more eggs, and is typically crustless. It's baked in a water bath at lower temperatures for its signature jiggly, fluffy texture.
- → Why do I need to use a water bath when baking?
The water bath provides gentle, even heat distribution which prevents the cheesecake from cracking and helps achieve the signature soft, moist texture. It creates a humid environment in the oven that's essential for the delicate structure of cotton cheesecake.
- → Can I make this ahead of time?
Yes! In fact, these mini cotton cheesecakes benefit from refrigeration. Make them a day ahead and refrigerate overnight for the best texture and flavor development. They'll keep well refrigerated for up to 3 days.
- → How do I know when the cheesecakes are done baking?
The mini cotton cheesecakes are done when they're lightly golden on top and still have a slight jiggle in the center when gently shaken. Avoid overbaking as they'll continue to set while cooling. A toothpick inserted near the center should come out mostly clean with a few moist crumbs.
- → Can I freeze these mini cheesecakes?
Yes, these freeze well. Cool completely, then wrap individually in plastic wrap and place in an airtight container. Freeze for up to 1 month. Thaw overnight in the refrigerator before serving for the best texture.