
 Pin it
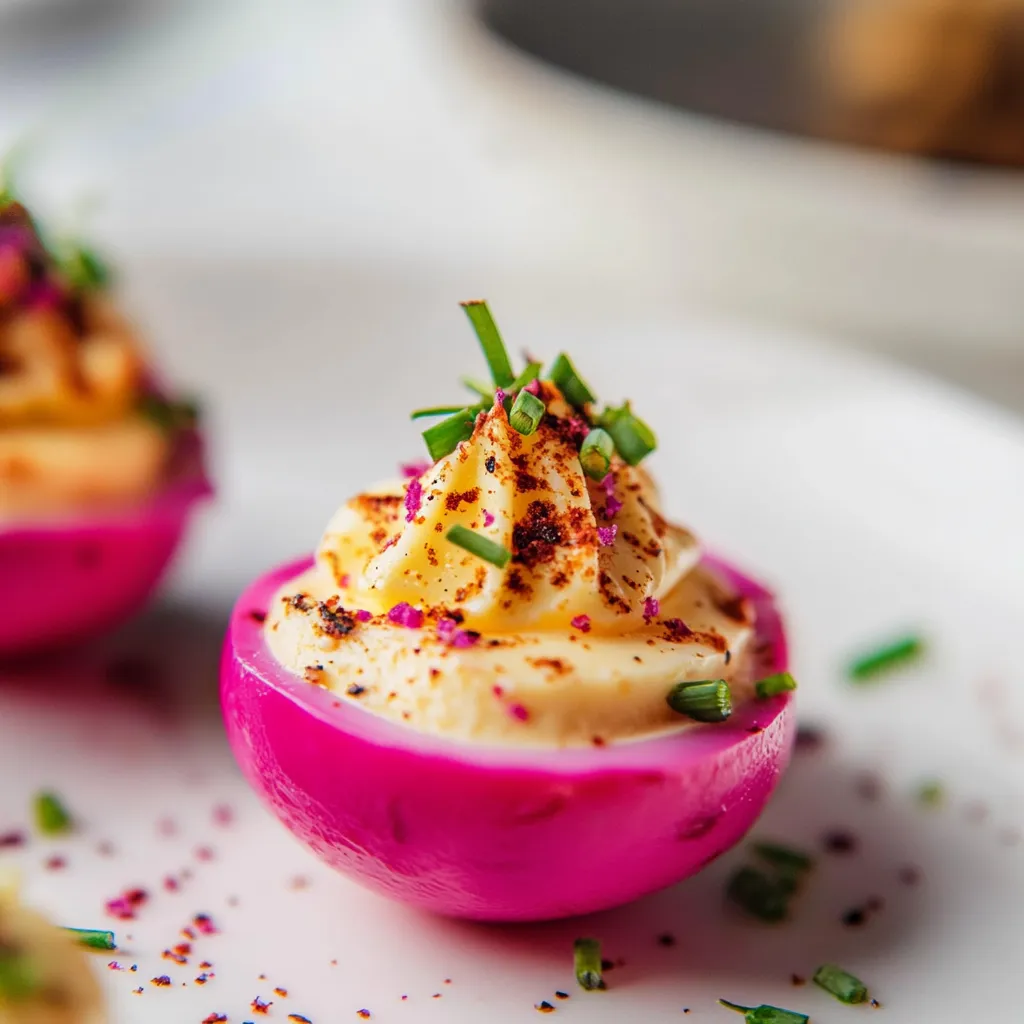
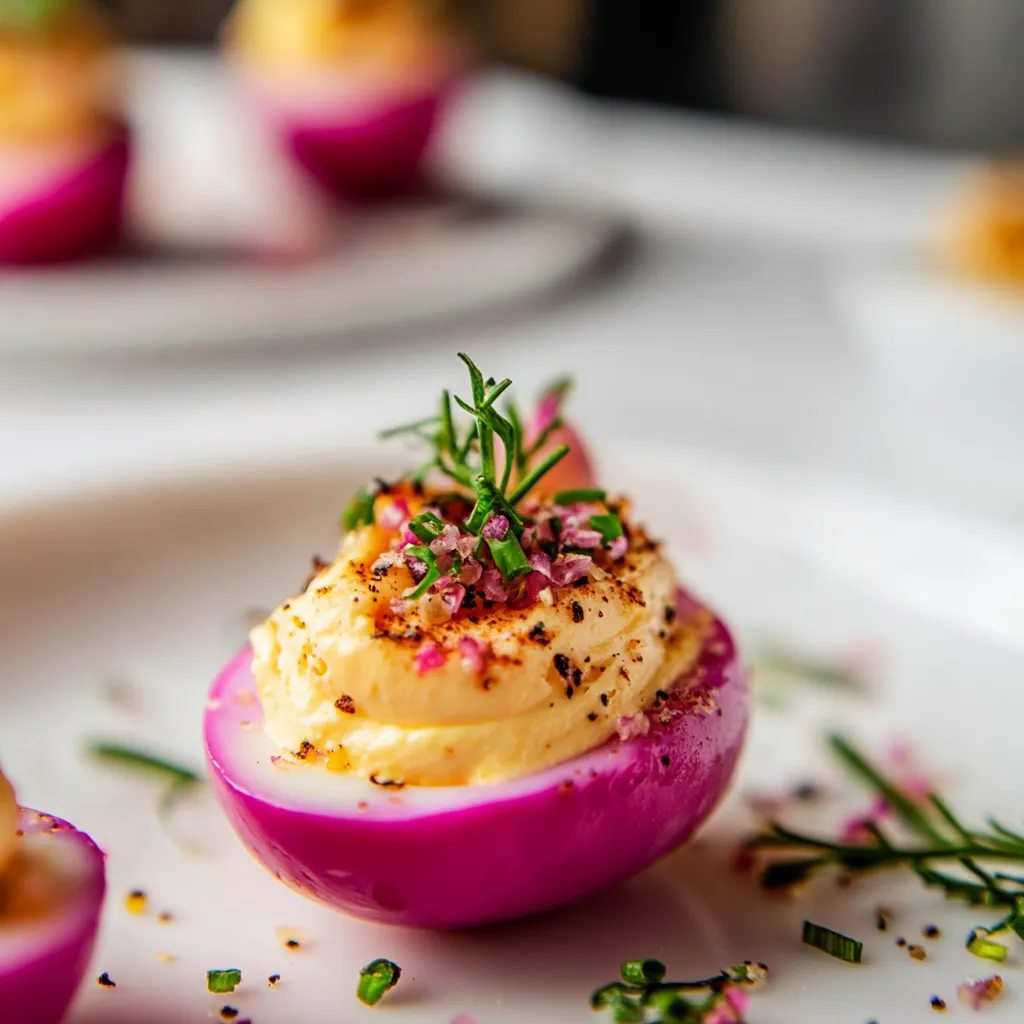
This vibrant pink deviled egg recipe transforms the classic appetizer into a stunning showstopper. The natural beet dye creates a beautiful pink hue that makes these eggs perfect for holidays, special occasions, or anytime you want to add a pop of color to your table.
I first made these for a springtime brunch and my guests couldn't stop taking photos before devouring them. Now they're requested at every gathering, with everyone excited to see what garnish combinations I'll create next.
Ingredients
- Medium beets: Add natural color and subtle earthiness. Choose firm beets without soft spots.
- Apple cider vinegar: Provides acidity that helps the color penetrate the eggs. Use raw unfiltered for best flavor.
- Sea salt: Enhances the pickling brine. Opt for a good quality finishing salt.
- Black peppercorns: Add subtle spice. Select whole peppercorns rather than ground for cleaner flavor.
- Bay leaves: Contribute aromatic notes. Fresh or dried both work well.
- Store bought pickled beets: Offer a convenient time saving alternative.
- Extra large eggs: Provide more filling per egg. Choose the freshest possible for easier peeling.
- Lemon juice or dill pickle juice: Adds brightness and balances richness.
- Dijon mustard: Provides classic deviled egg flavor. Look for authentic French varieties.
- Cold butter: Creates an incredibly silky luxurious filling texture.
- Kewpie mayo: Offers subtle sweetness and creaminess. Regular mayonnaise works too.
Step-by-Step Instructions
- Prepare the Beet Pickle:
- Combine peeled and thinly sliced beets with water, apple cider vinegar, sea salt, peppercorns, and bay leaves in a pot. Bring the mixture to a rolling boil, allowing the beets to release their vibrant color into the liquid. Remove from heat and let cool completely in a container large enough to hold both the beet liquid and eggs. The pickling liquid needs to fully cool before adding eggs to ensure even coloring.
- Perfect Hard Boiled Eggs:
- Place eggs in a single layer in a pot and cover with cold water by about an inch. Bringing eggs from cold rather than adding to already boiling water prevents cracking. Bring water to a boil over medium high heat. Stir eggs gently a few times during heating to center the yolks for perfect deviled eggs. Once boiling, turn off heat, cover pot with a tight lid, and let sit undisturbed for 11 to 12 minutes. Set a timer to avoid overcooking which causes that unappetizing gray ring around the yolks.
- Create Pink Pickled Eggs:
- For standard pink eggs, remove shells completely and submerge peeled eggs in the cooled beet pickling liquid for exactly 2 hours. The timing is important as too short creates uneven color while too long can affect the texture of the whites. After pickling, drain the eggs and gently pat dry with paper towels to remove excess moisture before cutting.
- Halloween Webbed Effect Option:
- For a striking spider web pattern perfect for Halloween, crack the eggshells all over without removing them. Leave shells intact and submerge cracked eggs in beet liquid for 4 hours. The pickle juice will seep through the cracks creating a spiderweb pattern when peeled. This technique requires additional time but creates a dramatic presentation worth the effort.
- Make Luxurious Filling:
- Carefully slice each egg in half lengthwise and gently remove the yolks without tearing the whites. Place yolks in a food processor with lemon juice, Dijon mustard, cold diced butter and mayo. Blend until extremely light and fluffy, stopping to scrape down sides if needed. The cold butter is key for creating an exceptionally creamy texture unlike typical deviled eggs.
- Troubleshoot If Needed:
- If your filling looks split or broken, simply chill it in the freezer for 10 minutes then blend again. The cold temperature will help the butter emulsify properly with the other ingredients, resulting in a smooth, velvety filling. This is a professional kitchen trick that solves most filling texture issues.
- Assemble and Garnish:
- Transfer the filling to a piping bag fitted with a star tip for an elegant presentation, or simply spoon the mixture into the egg whites. Garnish with your choice of toppings like crispy bacon shards, thinly sliced chives, fresh dill, pickled red onion, capers, cucumber slices, or radish. Each garnish adds different flavor dimensions and textures creating a customized experience.
 Pin it
The butter in the filling is my secret weapon for these eggs. I discovered this technique while working in a fine dining kitchen, and it completely transforms the texture from good to extraordinary. My grandmother always made deviled eggs for our family gatherings, but these colorful versions have become our new tradition that even the kids help prepare.
Make Ahead Tips
These deviled eggs can be prepared in stages to make entertaining easier. Hard boil and pickle the eggs up to 3 days before your event, storing them uncut in an airtight container. The filling can be made 1 day ahead and kept in a piping bag in the refrigerator. Simply cut the eggs and pipe the filling shortly before serving for the freshest presentation.
Flavor Variations
The basic recipe serves as an excellent canvas for creative flavor profiles. For a Mediterranean twist, add finely chopped sun dried tomatoes and crumbled feta to the filling. Asian inspired deviled eggs work beautifully with a teaspoon of sriracha and a sprinkle of black sesame seeds. For a southern classic, incorporate sweet pickle relish into the filling and top with a dash of paprika.
Seasonal Variations
Consider the season when choosing variations. In summer, fresh herbs like basil and tarragon bring brightness, while fall variations might include crumbled sage and brown butter.
 Pin it
These pink deviled eggs are sure to impress! Perfect for every occasion, they’re a vibrant yet easy-to-make masterpiece.
Frequently Asked Questions
- → Can I use store-bought pickled beets instead of making the brine?
Yes, you can substitute the homemade beet pickle brine with a large jar of store-bought pickled beets. This is mentioned as an alternative in the ingredients list and will save preparation time while still providing the vibrant pink color.
- → Why does my yolk filling look split or broken?
This can happen if the butter isn't properly chilled or if the mixture becomes too warm during processing. The recipe suggests a simple fix: place the mixture in the freezer for about 10 minutes to chill, then blend again to properly emulsify the ingredients.
- → What's the difference between the two soaking methods?
The recipe offers two decorative options: For solid pink eggs, peel the eggs first and soak in beet liquid for 2 hours. For the 'dinosaur webbed' effect, crack the shells (but leave them on) before soaking for 4 hours, then peel to reveal a marbled pattern where the brine seeped through the cracks.
- → How do I ensure the yolks stay centered in the eggs?
The recipe recommends gently stirring the eggs a few times as the water comes to a boil, then stirring twice more during the first 3 minutes of resting time. This helps keep the yolks centered for more attractive and evenly-filled deviled eggs.
- → What if I don't have a food processor for the filling?
You can achieve a similar result without a food processor by first mashing the yolks very finely with a fork, then beating in the other ingredients until the mixture becomes smooth, light and fluffy. It may require a bit more effort by hand, but the result will still be delicious.
- → What garnishes work best with these pink eggs?
The recipe suggests several complementary garnishes including crispy bacon shards, thinly sliced chives, fresh dill, pickled red onion, capers, cucumber slices, and radish slices. You can use as many or as few as you prefer, and the recipe encourages customization based on what you have available.