
 Pin it
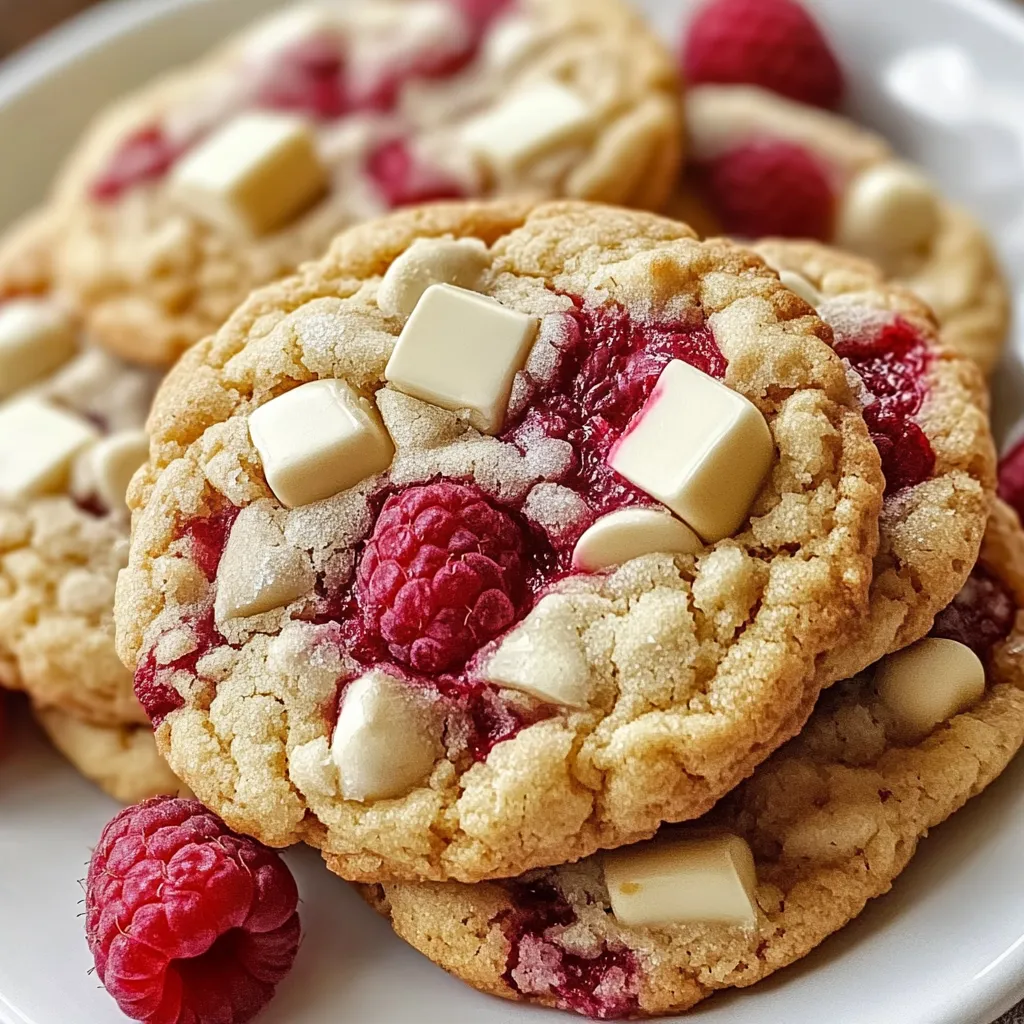
Raspberry white chocolate cookies deliver an irresistible contrast between sweet and tart in every bite. The cookies maintain that perfect balance with a slightly crisp exterior giving way to an indulgently gooey center where pockets of melted white chocolate mingle with bursts of bright raspberry flavor. Unlike traditional chocolate chip cookies, these treats provide a sophisticated flavor combination that feels both familiar and exciting. The secret lies in the interplay between the creamy sweetness of quality white chocolate and the vibrant tanginess of raspberries, all wrapped in a buttery, vanilla-scented dough that stays wonderfully chewy long after baking.
I first discovered this recipe during berry season years ago when my kitchen counters overflowed with raspberries from our local farm. While searching for something beyond jam to make with our bounty, I experimented with adding them to cookie dough. The first batch disappeared within hours as family members kept sneaking 'just one more' from the cooling rack. Now they've become our signature treat for gatherings, and friends regularly request them for special occasions.
Cookie Essentials
- 1 cup unsalted butter: Creates the rich foundation and contributes to the cookies' gooey texture; always use room temperature butter for proper creaming.
- 3/4 cup granulated sugar: Provides sweetness and helps create those slightly crisp edges that contrast beautifully with the soft centers.
- 3/4 cup light brown sugar: Adds moisture and a subtle caramel undertone that complements both the raspberries and white chocolate.
- 2 large eggs: Bind everything together while contributing to the chewy texture; room temperature eggs incorporate much more effectively.
- 2 teaspoons vanilla extract: Enhances all other flavors in the cookie without overwhelming them; use pure extract for best results.
- 2 1/4 cups all-purpose flour: Forms the structure while still allowing for a tender crumb; weighing flour rather than measuring by volume ensures consistent results.
- 1 teaspoon baking soda: Provides just enough lift without making the cookies cakey; always check that it's fresh for optimal rise.
- 1/2 teaspoon salt: Balances sweetness and enhances flavor complexity; kosher salt works wonderfully here.
- 1 1/2 cups premium white chocolate chips: Deliver creamy sweetness that contrasts with the tart raspberries; higher quality chips with real cocoa butter melt more beautifully.
- 1 1/2 cups fresh or frozen raspberries: Bring bright, tangy bursts of flavor throughout each cookie; frozen berries actually work better as they hold their shape during mixing.
Baking Process
- Prepare Your Space:
- Position oven racks in the upper and lower thirds of your oven and preheat to exactly 350°F. Line baking sheets with parchment paper rather than greasing them to prevent excessive spreading and ensure easy removal.
- Create The Foundation:
- Whisk together flour, baking soda, and salt in a medium bowl until thoroughly combined. This even distribution prevents any surprise pockets of salt or leavening agent in your finished cookies.
- Build The Base:
- Beat room temperature butter until noticeably lighter in color using an electric mixer. Gradually add both granulated and brown sugars while continuing to beat on medium speed. Continue this creaming process for a full 3 minutes until the mixture becomes remarkably fluffy and pale.
- Add Moisture Elements:
- Incorporate eggs one at a time, allowing each to fully blend before adding the next. Pour in vanilla extract and mix until the batter looks silky and uniform. Scrape down the sides of your bowl frequently during this process to ensure even mixing.
- Combine With Care:
- Add your dry ingredients gradually, mixing on low speed just until flour disappears. Overmixing at this stage develops gluten that toughens cookies, so stop the moment the flour is incorporated.
- Introduce Special Ingredients:
- Gently fold in white chocolate chips by hand using a flexible spatula. Once evenly distributed, carefully fold in raspberries with minimal strokes.
- Shape Strategically:
- Scoop generous portions of dough onto prepared baking sheets, spacing them at least 2 inches apart.
- Bake With Precision:
- Bake for exactly 11 minutes, then check for doneness. The perfect cookie will have set edges while centers remain visibly soft and underbaked.
- Cool Properly:
- Allow cookies to remain on hot baking sheets for exactly 5 minutes before transferring to cooling racks.
 Pin it
Raspberries have always been my favorite berry for baking. My grandmother had raspberry bushes along her back fence when I was growing up, and those sun-warmed berries eaten straight from the canes spoiled me for life. Nothing from the store ever tastes quite as vibrant.
Storage Solutions
These cookies store beautifully. Keep them in an airtight container with parchment paper between layers to maintain their texture. If you'd like to enjoy them warm again, a quick 10-second zap in the microwave brings back that fresh-baked gooeyness.
 Pin it
Chef Insights
Using a combination of white and brown sugar contributes to the chewy texture, as brown sugar contains molasses that adds moisture. If your kitchen runs warm, chilling the dough for 30 minutes before baking can help prevent excessive spreading, leading to thick, bakery-style cookies.
Frequently Asked Questions
- → Can I use frozen raspberries instead of fresh?
- Yes, frozen raspberries actually work better in these Gooey Raspberry White Chocolate Cookies! They're easier to fold into the dough without breaking down completely, which helps maintain those delicious pockets of jammy berry goodness. Add them directly from the freezer - don't thaw them first, as this prevents excess moisture from making your dough too wet. The frozen berries will naturally thaw during the mixing and baking process.
- → How do I know when these cookies are properly baked?
- The perfect Gooey Raspberry White Chocolate Cookies should have lightly golden edges but still appear slightly underdone in the center when you remove them from the oven. The cookies will continue cooking from residual heat on the baking sheet. After about 12-15 minutes of baking, the edges should be set while the centers remain soft. Don't wait until they look completely done, or you'll lose that signature gooey center. They'll firm up as they cool but maintain their delicious soft texture.
- → Why did my white chocolate turn brownish when baking?
- White chocolate can sometimes take on a light brownish hue if your oven temperature is too high. For perfect Gooey Raspberry White Chocolate Cookies, make sure your oven is properly preheated to 350°F and consider using an oven thermometer to verify the temperature. Also, position your rack in the middle of the oven rather than the bottom to prevent excessive browning. Using higher quality white chocolate with real cocoa butter (rather than palm oil substitutes) also helps it maintain its creamy color and texture during baking.
- → Can I make the cookie dough ahead of time?
- Absolutely! The dough for Gooey Raspberry White Chocolate Cookies can be prepared ahead and refrigerated for up to 24 hours before baking. You can also portion the dough into balls, place them on a baking sheet, freeze until solid, then transfer to a freezer bag for storage up to 3 months. When ready to bake, place the frozen dough balls directly on your baking sheet and add 2-3 minutes to the baking time - no need to thaw. This is perfect for when you want freshly baked cookies without starting from scratch.
- → Why did my raspberries turn the whole cookie pink?
- If your entire cookie dough turned pink, you likely overmixed after adding the raspberries. For picture-perfect Gooey Raspberry White Chocolate Cookies with distinct berry pockets, fold the raspberries in very gently at the very end of mixing using a rubber spatula rather than an electric mixer. A few streaks of pink throughout the dough is normal and gives the cookies a pretty marbled effect, but the goal is to keep most berries relatively intact. Using frozen berries can also help maintain their shape during mixing.