
 Pin it
This traditional Snow Skin Mooncake recipe brings the elegance of Asian festive celebrations right to your kitchen. These delicate, colorful treats feature a soft, slightly chewy exterior wrapped around a rich custard center, creating the perfect balance of textures and flavors that make mooncakes so beloved.
I first made these mooncakes when I wanted to surprise my Chinese friend during the Mid-Autumn Festival. The look of nostalgia and joy on her face when she bit into one made all the effort worthwhile, and now they're my go-to dessert for celebrating cultural traditions.
Ingredients
- Milk powder: Creates the iconic rich base for traditional mooncake filling
- Cornstarch: Helps achieve the perfect custard texture that holds its shape
- Powdered sugar: Dissolves completely for a smooth filling without graininess
- Salt: Enhances all the sweet flavors and balances the richness
- Milk: Use whole milk for the creamiest result
- Egg yolks: Provide richness and that beautiful golden color
- Condensed milk: Adds that signature sweetness and velvety texture
- Unsalted butter: For richness without any competing salt flavor
- Vanilla extract: Use pure extract for the best flavor profile
- Rice flour: Gives the skin its distinctive tender texture
- Glutinous rice flour: Essential for that pleasantly chewy mouthfeel
- Wheat starch: Creates the delicate snow white appearance
- Powdered sugar: Dissolves easily for a smooth skin without graininess
- Whole milk: Provides richness and helps bind the dough
- Vegetable oil: Prevents the skin from drying out
- Vanilla extract: Adds subtle warmth choose high quality for best results
- Cornstarch: For dusting prevents sticking without affecting taste
- Food coloring: Options are endless use gel colors for the most vibrant results
Step-by-Step Instructions
- Prepare the Custard Filling:
- Thoroughly whisk together milk powder, cornstarch, powdered sugar, and salt in a medium bowl until completely uniform. Ensure no lumps remain as these affect texture.
- Mix wet ingredients:
- Combine milk, egg yolks, and condensed milk in a separate bowl, whisking until smooth and well incorporated.
- Create custard base:
- Pour the wet mixture into the dry ingredients and mix until smooth. Scrape bowl sides to incorporate all dry elements.
- Cook the custard:
- Transfer to a saucepan over medium heat, stirring constantly. It will thicken into a paste-like texture after 5 minutes.
- Finish the custard:
- Stir in butter and vanilla until fully melted. The custard should hold shape when scooped.
- Chill for setting:
- Refrigerate for 1 hour or freeze for 20 minutes. Then, divide and roll into appropriately sized balls based on mold size.
- Make the Snow Skin:
- Sift rice flour, glutinous rice flour, wheat starch, and powdered sugar, then mix with milk, vegetable oil, and vanilla. Strain mixture and steam for 18-20 minutes until cooked.
- Knead dough until smooth:
- Once cooled, knead dough for 5 minutes and refrigerate for 30 minutes to 2 hours.
- Assemble the Mooncakes:
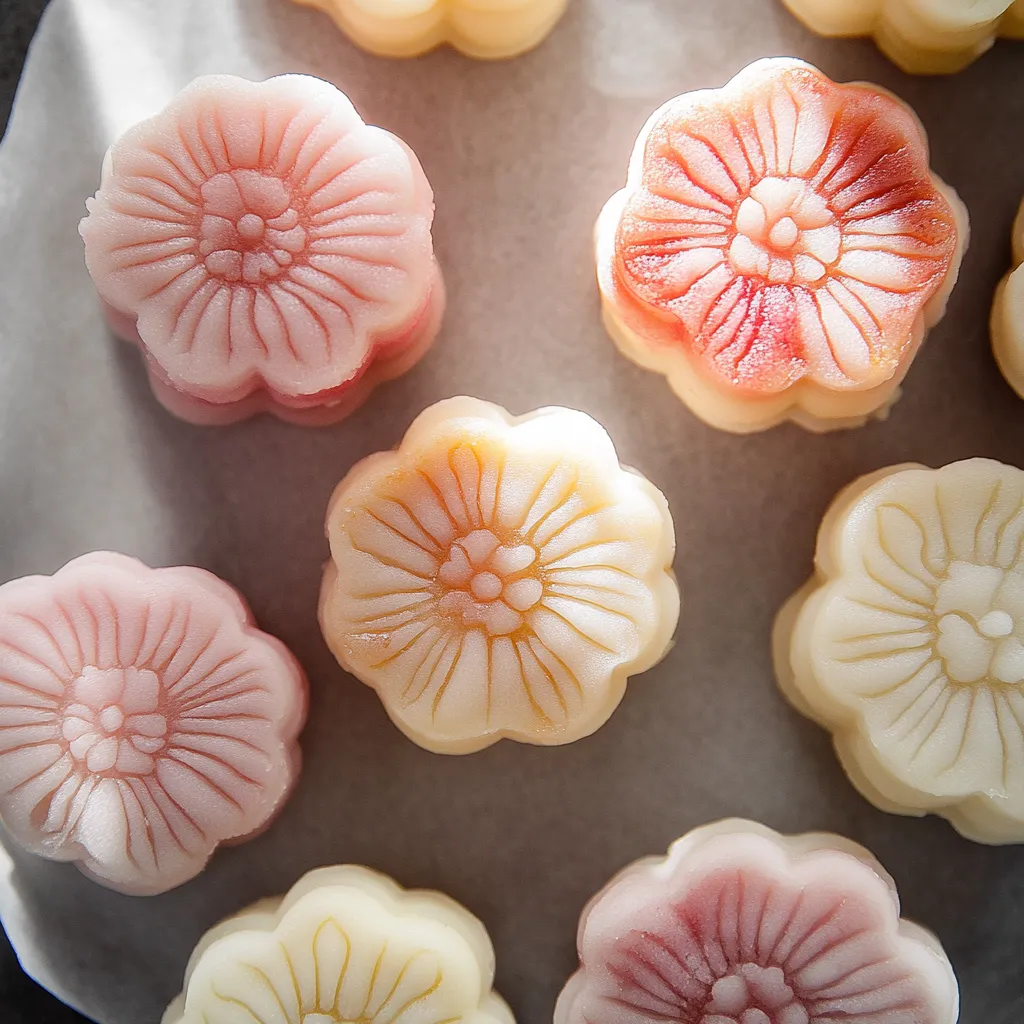
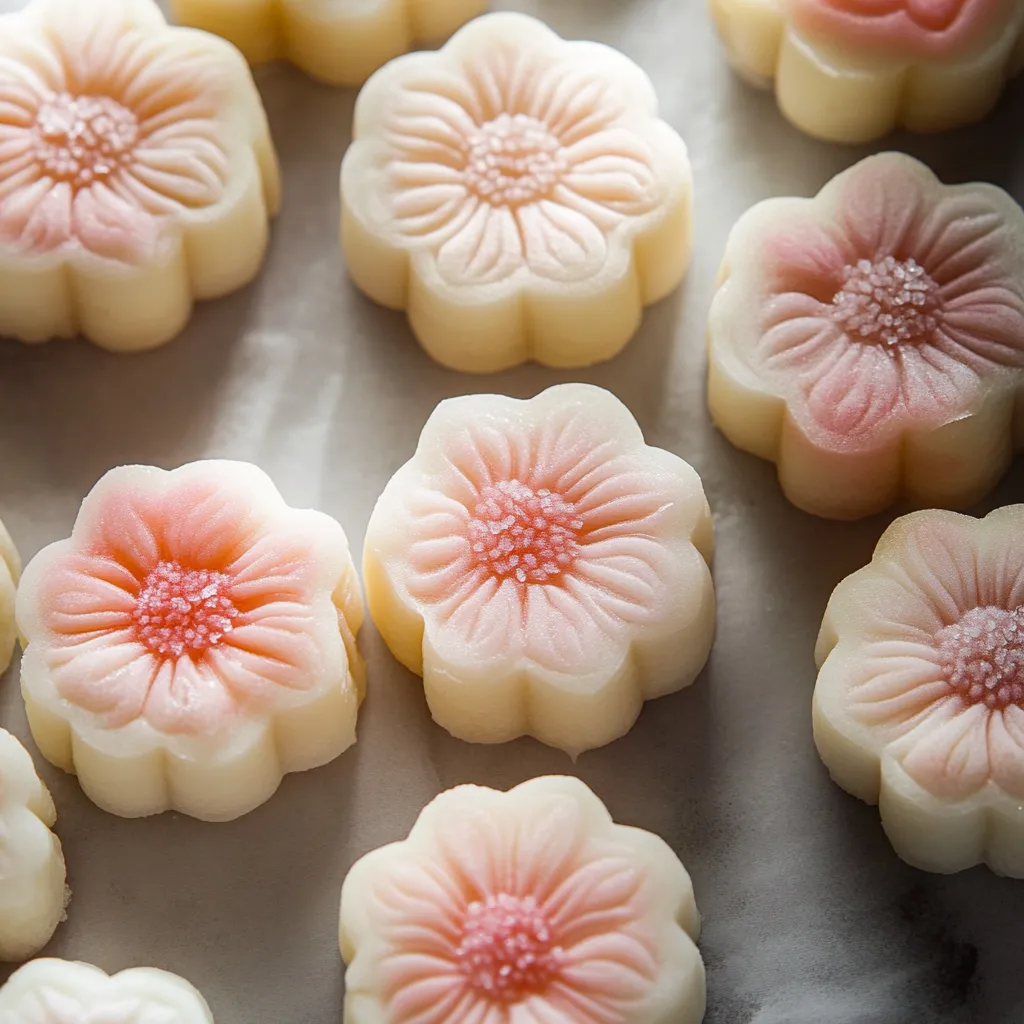
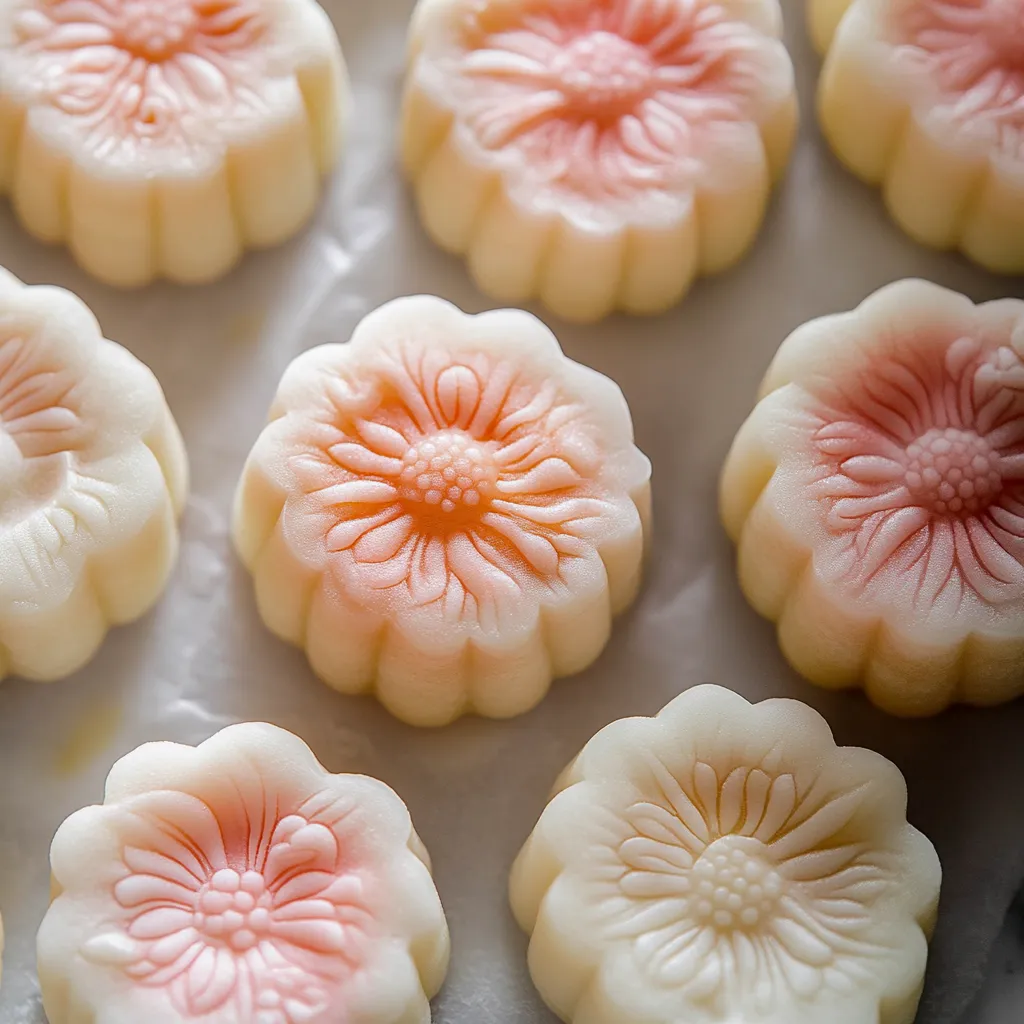
- Use food coloring as desired. Combine dough and filling in equal proportions, wrap filling, seal edges, and press into molds. Chill before serving.
 Pin it
The custard filling is absolutely my favorite part of these mooncakes. My first attempt years ago resulted in a filling that was far too loose because I didn't cook it long enough. Now I know that patience during the cooking process is key – when the custard pulls away from the sides of the pot and holds its shape like Play-Doh, that's when you know it's perfect.
Storage Tips
These snow skin mooncakes must be stored in the refrigerator in an airtight container. Unlike traditional baked mooncakes, the snow skin variety will dry out quickly if left at room temperature for too long. They'll keep beautifully for up to 3 days, though the texture is at its prime within the first 48 hours. If you need to store them longer, you can freeze them individually wrapped in plastic and then placed in a freezer bag for up to one month. Allow them to thaw in the refrigerator overnight before serving.
Creative Variations
The beauty of snow skin mooncakes lies in their versatility. Beyond the custard filling in this recipe, you can experiment with traditional fillings like red bean paste, lotus seed paste, or even modern interpretations with chocolate ganache, matcha, or fruit jams. For the snow skin itself, try incorporating natural food colorings like butterfly pea flower for blue, pandan extract for green, or freeze-dried fruit powders for vibrant colors and subtle flavors. Some bakers even add a small amount of coconut milk to replace some of the regular milk for a tropical twist.
Cultural Significance
Snow skin mooncakes are a relatively modern evolution of the traditional baked mooncakes served during the Mid-Autumn Festival. While the classic baked varieties have a history stretching back over a thousand years, snow skin mooncakes emerged in the 1960s in Hong Kong as a lighter, refreshing alternative. The Mid-Autumn Festival celebrates the harvest moon, which is believed to be at its fullest and brightest during this time. Families gather to share mooncakes while appreciating the moon, symbolizing completeness and reunion. The round shape of mooncakes represents family unity and completeness, making them not just a delicious treat but a meaningful cultural symbol.
 Pin it
Making these delicate treats may require some practice, but the results are truly rewarding. The contrast between the tender, chewy snow skin and the rich, creamy custard creates a beautiful harmony of textures that makes these mooncakes irresistible.
Frequently Asked Questions
- → How long do snow skin mooncakes stay fresh?
Snow skin mooncakes can be stored in an airtight container in the refrigerator for up to 3 days. For best texture and taste, consume within 1-2 days of making them. They do not freeze well as the snow skin texture can become compromised upon thawing.
- → Can I use different fillings instead of custard?
Absolutely! While custard filling is traditional, snow skin mooncakes can be filled with red bean paste, lotus seed paste, mung bean paste, or even fruit and chocolate ganache. Just ensure your filling has a similar consistency to the custard so it holds its shape when molded.
- → Why do I need to dust the mooncakes with cornstarch?
Cornstarch prevents the snow skin dough from sticking to surfaces, your hands, and the mold. It's essential for achieving clean lines in the final design. Just be sure to use a light dusting as too much cornstarch can leave a powdery taste.
- → Do I need special equipment to make snow skin mooncakes?
While traditional mooncake molds create the distinctive designs that make these treats recognizable, you can make simplified versions using round cookie cutters or small bowl molds. The steamer is essential for cooking the snow skin dough properly.
- → What causes snow skin mooncakes to be too sticky?
Sticky dough typically results from too much moisture in the snow skin mixture or insufficient steaming. Make sure to follow the exact measurements, steam the dough thoroughly until it passes the spoon test, and allow proper cooling time. Using food-safe gloves during handling can also help manage stickiness.
- → Can I make snow skin mooncakes in advance for a celebration?
You can prepare the custard filling 1-2 days in advance and keep it refrigerated. The snow skin dough is best prepared the same day, though it can be made a few hours ahead. Fully assembled mooncakes should be consumed within 1-3 days for optimal freshness and texture.