Decadent Pistachio Tiramisu

Featured in: Sweet Treats for Every Occasion

This luxurious vegan pistachio tiramisu transforms the classic Italian dessert with plant-based ingredients. The recipe features homemade pistachio ladyfingers made with aquafaba meringue, a silky mascarpone-style cream using pistachio butter and silken tofu, and traditional coffee-soaked layers. After assembling, the dessert is topped with dairy-free whipped cream and decorative pistachio elements. For best results, chill overnight before serving to allow the flavors to meld perfectly.

A smiling woman in an apron poses for a selfie in a professional kitchen.
Updated on Fri, 25 Apr 2025 10:42:38 GMT
A slice of cake with almonds on top. Pin it
A slice of cake with almonds on top. | tastygusto.com

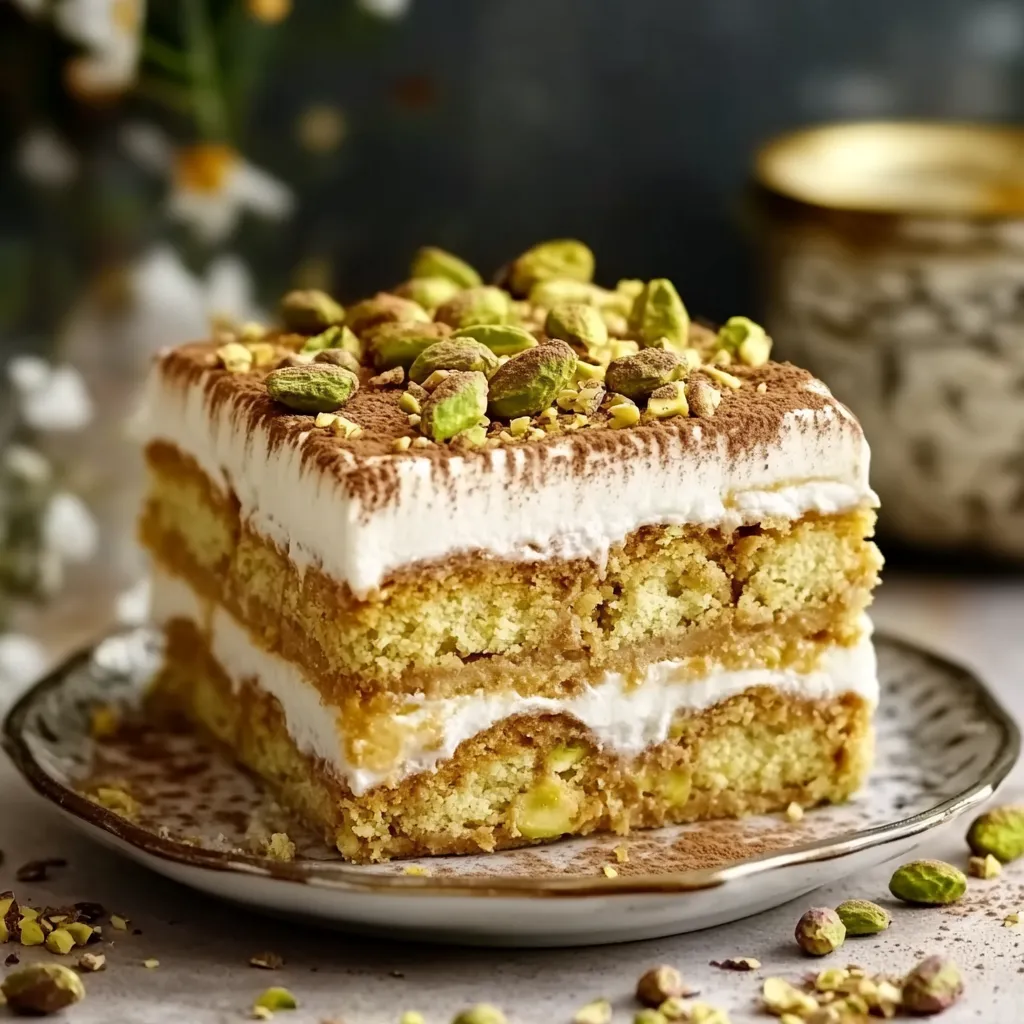
This pistachio tiramisu offers all the creamy decadence of the classic Italian dessert but with a plant-based twist that celebrates the rich, nutty flavor of pistachios throughout every layer. Even skeptical non-vegans will be impressed by how authentic this tastes.

I created this version after a friend challenged me to make a vegan dessert that would fool her Italian grandmother. Not only did Nonna approve, she asked for the recipe to serve at her next dinner party.

Ingredients

  • Aquafaba: From chickpeas forms the base of our egg-free ladyfingers and creates that perfect light texture
  • Pistachio butter: Provides the distinctive nutty flavor that makes this version unique
  • Silken tofu: Creates the creamy base for our mascarpone alternative without any bean flavor
  • Dairy-free whipping cream: Adds lightness to both filling and topping
  • Coconut cream: Helps bind the ladyfingers with richness
  • Fresh brewed coffee: Provides that essential tiramisu flavor note
  • Vanilla extract: Enhances all the flavors while balancing sweetness

Step-by-Step Instructions

Preparing the Ladyfingers:
Whip aquafaba with cream of tartar until soft peaks form. This process typically takes 5-8 minutes with an electric mixer. The mixture should become foamy and increase in volume substantially.
Add Sugar Gradually:
Slowly incorporate caster sugar while continuing to whip at high speed until stiff, glossy peaks form. Test by carefully inverting the bowl if the meringue stays put, it is ready. This meringue forms the structure of our eggless ladyfingers.
Create Wet Mixture:
Combine oil, yogurt, coconut cream, vanilla, and remaining sugar in a separate bowl. This mixture provides moisture and richness to balance the airy meringue structure.
Fold Components Together:
Carefully incorporate the meringue into the wet mixture in stages using a gentle folding motion. Maintain as much air as possible in the batter to ensure light, fluffy ladyfingers.
Add Dry Ingredients:
Sift in the baking powder, flour, and ground pistachios, then fold just until combined. The mixture should be uniform but not overmixed, which would deflate the air bubbles.
Pipe and Bake:
Transfer batter to a piping bag and pipe 4-inch lines onto prepared baking sheets. Bake at 180°C fan for about 15 minutes until edges turn golden brown.
A slice of cake with almonds on top. Pin it
A slice of cake with almonds on top. | tastygusto.com

The pistachio butter is truly the star ingredient here. I stumbled upon using it instead of traditional coffee flavoring during a pantry cleanout experiment, and the nutty depth it adds has made this version my most requested dessert for gatherings. My nephew who claims to hate all vegan desserts asks for this by name.

Make-Ahead Tips

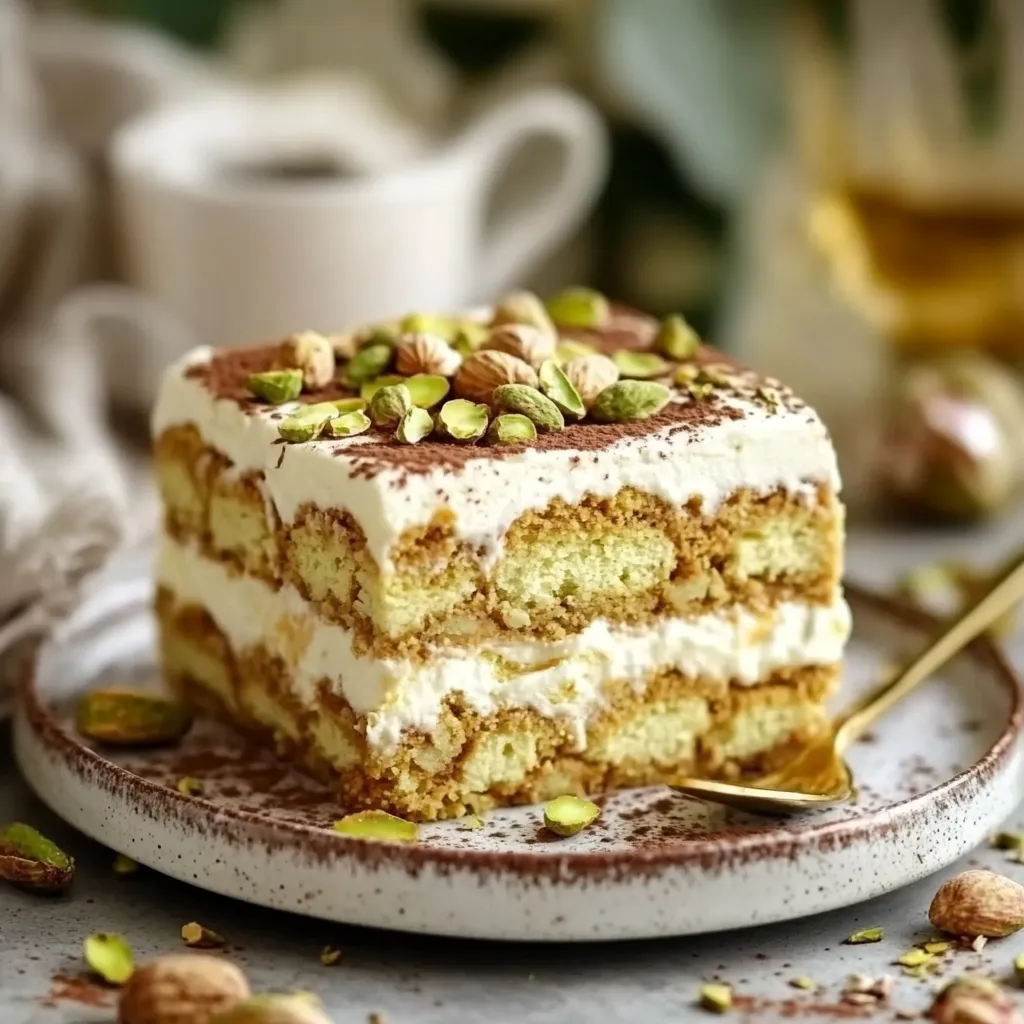
This tiramisu actually improves with time in the refrigerator. The flavors meld together and the ladyfingers soften to the perfect consistency when prepared at least 8 hours before serving. For best results, make it the day before your event.

Texture Perfection

The key to authentic tiramisu texture lies in the coffee-dipping technique. A quick 1-second dip is sufficient—any longer and the ladyfingers will become too soggy. If you prefer a firmer dessert, dip even more briefly, just enough to flavor the exterior.

Serving Suggestions

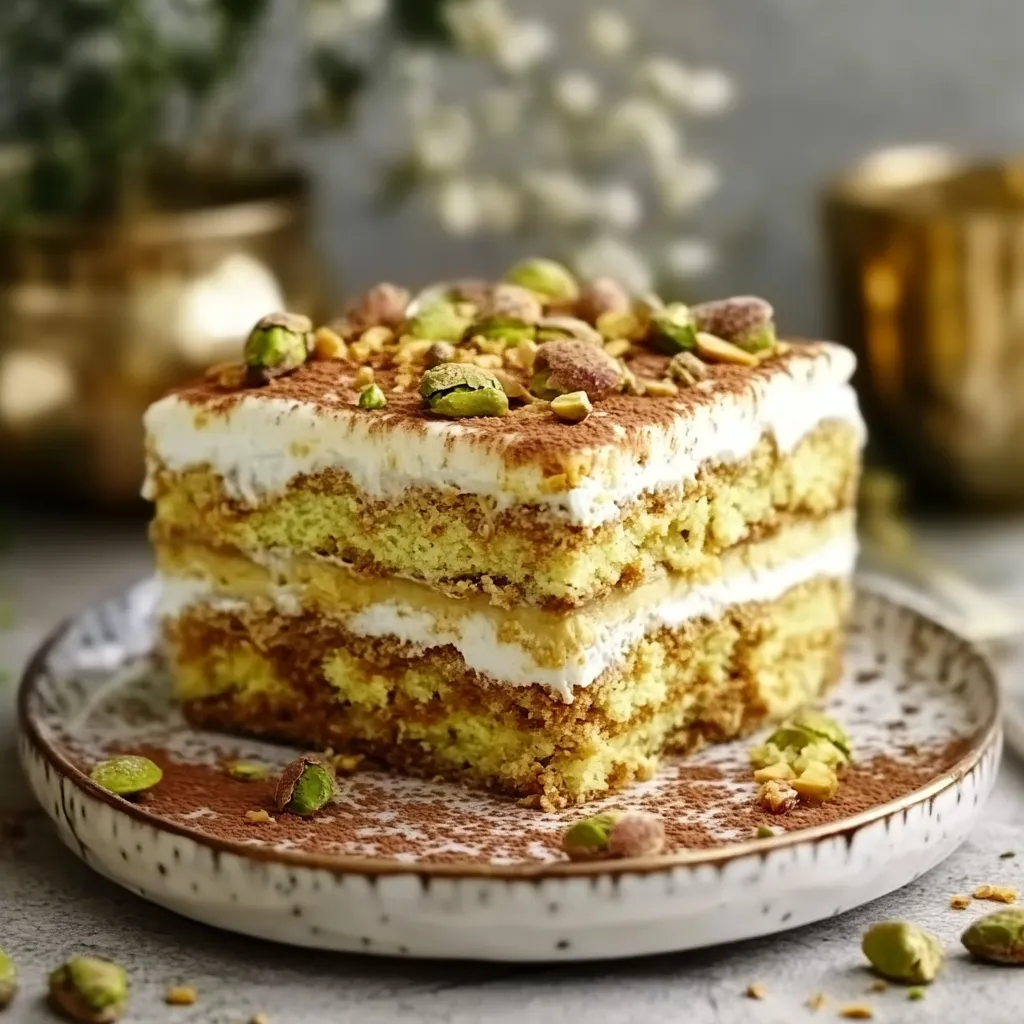
Cut the chilled tiramisu with a hot knife wiped clean between slices for the cleanest presentation. A metal cake server works best for removing slices from the dish without damaging the layers.

A slice of cake with white frosting and nuts on top. Pin it
A slice of cake with white frosting and nuts on top. | tastygusto.com

Every bite captures the perfect balance of flavors and textures—an unforgettable dessert experience.

Frequently Asked Questions

→ Can I prepare the pistachio tiramisu in advance?

Yes, this dessert actually benefits from being prepared in advance. For optimal flavor and texture, it's recommended to chill it in the refrigerator for 6-8 hours or preferably overnight before serving. This allows all the layers to set properly and the flavors to fully develop.

→ What is aquafaba and why is it used in this recipe?

Aquafaba is the liquid from canned chickpeas that mimics egg whites remarkably well. In this recipe, it's whipped with cream of tartar to create a meringue that gives the ladyfingers their light, airy texture—replacing the traditional egg whites used in conventional recipes.

→ Can I substitute the pistachio butter with another nut butter?

While pistachio butter gives this tiramisu its distinctive flavor, you could substitute it with other nut butters like almond or cashew butter. Keep in mind this will significantly change the flavor profile and color of the final dessert.

→ How do I prevent my ladyfingers from becoming too soggy?

The key is to quickly dip the ladyfingers in coffee rather than soaking them. A brief 1-2 second dip on each side is sufficient—the ladyfingers will continue to absorb moisture as the tiramisu sets in the refrigerator.

→ What type of dairy-free whipping cream works best?

Look for plant-based whipping creams specifically designed to whip, such as those made from coconut, soy, or oat. Coconut cream works especially well as it has a high fat content that helps it hold its shape after whipping.

→ Can I freeze leftover tiramisu?

Yes, you can freeze leftover tiramisu for up to 3 months. Cut it into individual portions before freezing, and wrap each piece well in plastic wrap and aluminum foil. Thaw overnight in the refrigerator before serving.

Vegan Pistachio Tiramisu

Indulgent dairy-free tiramisu featuring homemade pistachio ladyfingers, silky mascarpone cream, and coffee-infused layers.

Prep Time
60 Minutes
Cook Time
45 Minutes
Total Time
105 Minutes

Category: Desserts & Sweets

Difficulty: Difficult

Cuisine: Italian-Inspired Vegan

Yield: 12 Servings (One rectangular tiramisu (approximately 20cm x 30cm))

Dietary: Vegan, Vegetarian, Dairy-Free

Ingredients

→ Lady Fingers

01 180ml aquafaba (chickpea brine)
02 12g cream of tartar
03 180g caster sugar
04 60ml sunflower oil
05 20g dairy-free plain or vanilla yogurt
06 80g coconut cream
07 2 teaspoons vanilla extract
08 2 teaspoons baking powder
09 300g all-purpose flour
10 80g finely ground shelled pistachio nuts

→ Mascarpone Cream

11 80g pistachio butter
12 170g plant-based spreadable butter
13 350g silken tofu
14 160g caster sugar
15 120g plain or vanilla dairy-free yogurt
16 2 teaspoons vanilla extract
17 230ml dairy-free whipping cream

→ Toppings

18 Brewed coffee (for dipping)
19 200ml dairy-free whipping cream
20 40g pistachio butter
21 Chopped pistachio nuts

Instructions

Step 01

Preheat the oven to 180°C fan. Line 2 baking trays with greaseproof paper. This recipe makes 3-4 trays worth, so you'll bake one tray at a time.

Step 02

Pour the aquafaba into a medium/large mixing bowl and whisk on low, adding the cream of tartar. Using an electric hand whisk or stand mixer with balloon attachment, whip on high speed for 5-8 minutes until soft peaks form.

Step 03

While the aquafaba is whipping, gradually sprinkle in 150g of sugar. Continue whipping for 5-8 minutes until stiff peaks form. Test by holding the bowl upside down - the meringue should stay in place.

Step 04

In a separate bowl, combine oil, yogurt, coconut cream, vanilla, and remaining sugar. Whisk until fully incorporated.

Step 05

Using a spatula, carefully fold the meringue into the yogurt mixture in 2-3 stages to maintain the air incorporated in the meringue.

Step 06

Sift in the baking powder, flour, and finely ground pistachios. Fold gently until no dry ingredients are visible, being careful not to overmix.

Step 07

Transfer the mixture to a piping bag with a large round tip nozzle. Pipe lines approximately 10cm long and 4cm wide onto the lined trays, spacing them well as they will spread during baking.

Step 08

Bake one tray at a time in the middle of the oven for 15 minutes until the edges turn golden brown. Be vigilant to prevent burning.

Step 09

Allow the lady fingers to cool on the tray before transferring to a wire rack to cool completely. Repeat the process with remaining batter.

Step 10

Store cooled lady fingers in a sealed container at room temperature until needed. Use within 1-2 days to prevent softening.

Step 11

Blend pistachio butter, plant-based butter, silken tofu, sugar, yogurt, and vanilla in a high-speed blender for at least 5 minutes until smooth and creamy. Stop occasionally to scrape down sides.

Step 12

Whip the dairy-free cream in a stand mixer with balloon whisk attachment until thick peaks form.

Step 13

Pour the pistachio mixture over the whipped cream and fold together gently with a spatula, being careful not to overmix.

Step 14

Dissolve coffee granules in hot water to create a dipping solution. Let cool slightly before use.

Step 15

Briefly dip each lady finger in coffee solution (not too long or they'll become soggy) and arrange in a single layer in a rectangular dish.

Step 16

Spread a generous layer of mascarpone cream evenly over the lady fingers, using an offset spatula to reach the corners.

Step 17

Repeat the process with another layer of coffee-dipped lady fingers followed by mascarpone cream until all ingredients are used.

Step 18

Refrigerate for at least one hour before adding the topping.

Step 19

Whip the dairy-free cream until thick. Spread evenly over the chilled tiramisu, creating a flat, smooth surface.

Step 20

Pipe lines of pistachio butter across the top of the cream, then use a toothpick to create a feathered design. Sprinkle chopped pistachios around the edges for garnish.

Step 21

Refrigerate for 6-8 hours or preferably overnight to allow all layers to set properly.

Step 22

Using a sharp knife wiped clean between cuts, slice the chilled tiramisu into portions. Use a flat spatula to help lift out the first slice, which is typically the most challenging to remove neatly.

Notes

  1. For best results, chill the tiramisu overnight to ensure proper setting of all layers.
  2. Coconut cream can be separated from full-fat coconut milk by refrigerating the can overnight and scooping the solidified cream from the top.
  3. Look for dairy-free whipping cream alternatives made from soy, coconut, or oat bases.
  4. A drop of vegan-friendly green food coloring can enhance the pistachio appearance if desired.

Tools You'll Need

  • Electric stand mixer or hand mixer with balloon whisk attachment
  • High-speed blender
  • Piping bag with large round tip
  • Offset spatula
  • Rectangular serving dish
  • Baking trays
  • Greaseproof paper
  • Wire cooling rack

Allergy Information

Please check ingredients for potential allergens and consult a health professional if in doubt.
  • Contains nuts (pistachios)
  • Contains soy (silken tofu)