
 Pin it
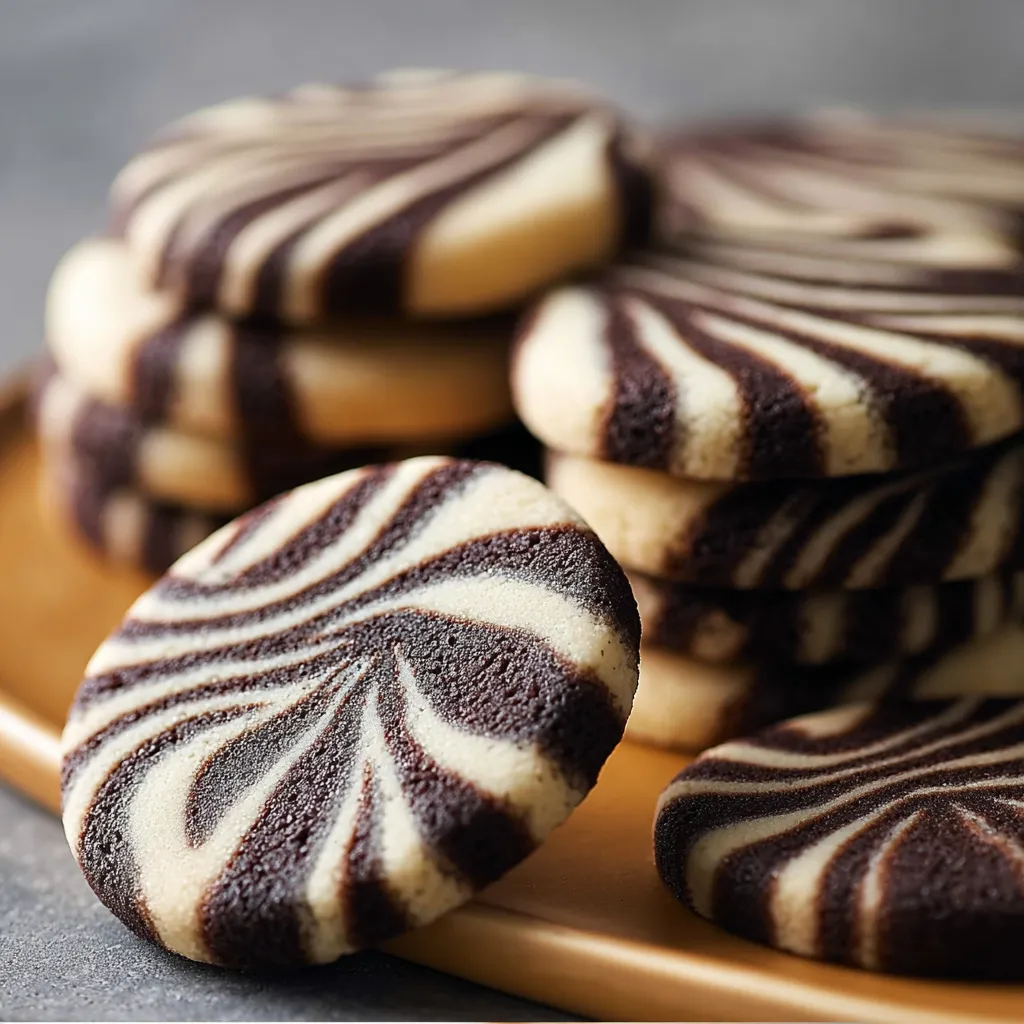
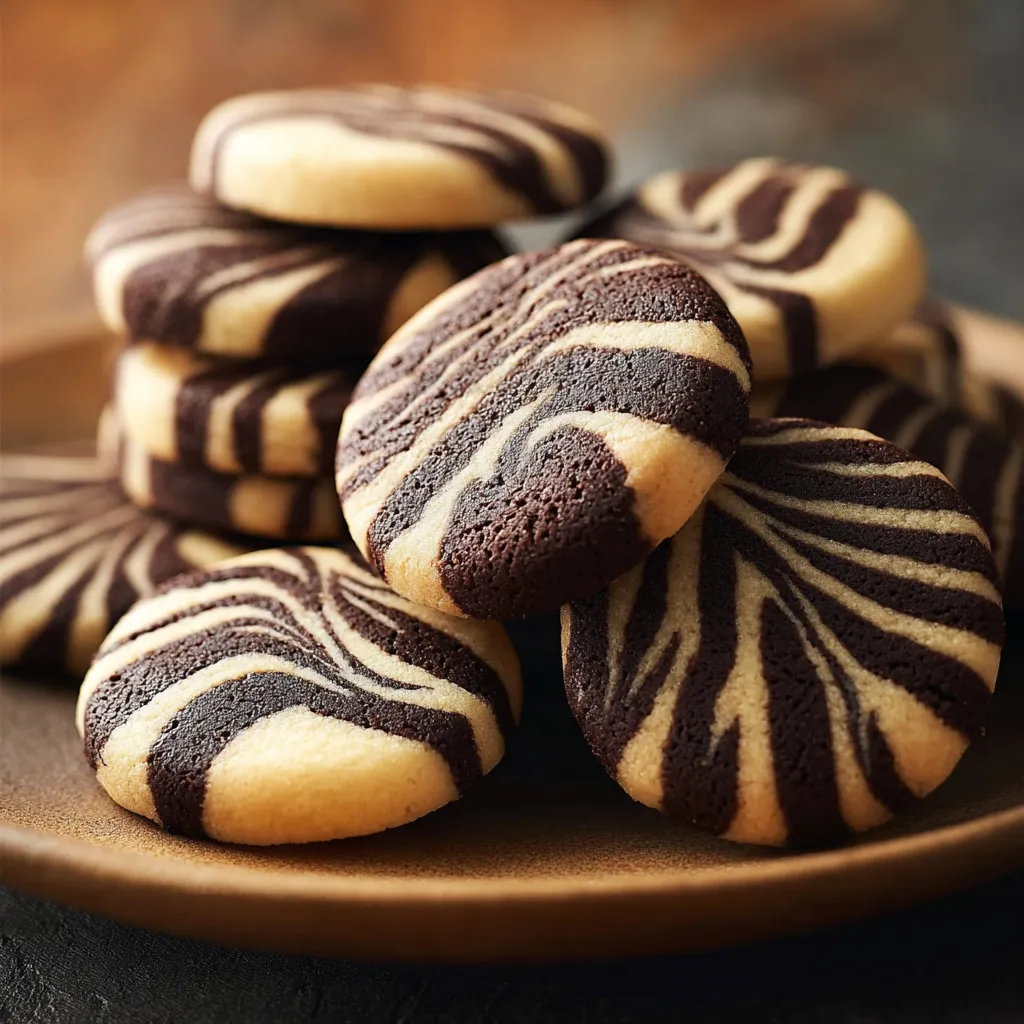
Zebra Cookies bring a delightful twist to the classic cookie experience with mesmerizing chocolate and vanilla swirls in every bite. These have been my favorite choice whenever I want to impress guests with a treat that’s equal parts beautiful and delicious. Compared to ordinary cookies, Zebra Cookies always spark conversation and make even a simple afternoon snack feel special.
The first time I baked these for my family, everyone was amazed at how artistic the cookies looked. Now, they are a tradition for every holiday cookie tray at our house.
Ingredients
- All-purpose flour: Brings structure and the right amount of tenderness to the cookies. Use a reputable brand for consistent results.
- Unsalted butter: Creates a rich flavor and perfect soft texture. Choose butter that is fresh and at room temperature for smooth creaming.
- Granulated sugar: Sweetens the dough and helps achieve a golden finish. Look for fine granulated sugar to blend easily with the butter.
- Large eggs: Bind the dough and provide moisture. Use eggs at room temperature for best results.
- Vanilla extract: Adds classic warmth to the vanilla layer. Opt for real vanilla extract if possible for a richer flavor.
- Unsweetened cocoa powder: Forms the dark chocolate swirl. Use high-quality cocoa for deeper flavor and vivid contrast.
- Salt: Balances the sweetness and boosts other flavors. Use fine sea salt for best integration.
- Baking powder: Helps the cookies rise just enough for a light bite. Make sure your baking powder is fresh for proper leavening.
Step-by-Step Instructions
- Prepare the Dough:
- Cream the butter and sugar together with an electric mixer until pale and fluffy. This step takes about 3 to 5 minutes and ensures your cookies have a delicate crumb. Next, beat in the eggs one at a time, then add vanilla extract, mixing until well combined.
- Divide and Flavor:
- Split the dough equally into two bowls. To one half, add the cocoa powder and mix thoroughly. This will be your chocolate dough, while the other remains plain for vanilla.
- Shape and Swirl:
- Take small spoonfuls of each dough and place them in alternating blobs on a lined baking sheet. Continue layering until you have used up all the dough. Then, use a toothpick or skewer to gently swirl the two doughs together, making sure to drag the swirls just enough to create a zebra pattern without overmixing.
- Chill and Set:
- Chill the swirled dough in the fridge for at least 30 minutes. This helps firm up the dough so the cookies hold their shape during baking and enhances the definition of the swirl.
- Bake to Perfection:
- Preheat your oven to 350 degrees Fahrenheit or 175 degrees Celsius. Bake the cookies for 10 to 12 minutes or until the edges look set but the centers are still soft. Remove from the oven and let the cookies cool on the baking sheet for about 5 minutes before transferring to a wire rack to cool completely.
 Pin it
One of my favorite things about this recipe is watching the zebra pattern appear as I swirl the dough. It always brings back memories of baking these cookies with my daughter, who loved to make the designs as creative as possible.
Storage Tips
For maximum freshness, store Zebra Cookies in an airtight tin at room temperature. They will remain soft for up to five days. If you want to prepare them ahead for a party, you can freeze the baked cookies in a sealed freezer bag for up to a month. Simply let them thaw at room temperature before serving. For extra softness, pop a slice of bread into the container with the cookies to keep them from drying out.
Ingredient Substitutions
If you are out of unsalted butter, you can use salted butter and reduce the added salt just a bit. Whole wheat flour can be swapped for part of the all-purpose for a nuttier texture, but avoid using only whole wheat or cookies will be dense. For a dairy-free version, use plant-based margarine and check that your cocoa contains no milk additives.
Serving Suggestions
Serve these cookies with a cold glass of milk or a strong coffee to balance the sweetness. They make a charming addition to any dessert table or lunchbox. Zebra Cookies also look lovely arranged in clear bags for gifting. I often stack them in a box with tissue paper for birthday party favors or neighborly gifts during the holidays.
Cultural and Historical Context
While Zebra Cookies are a newer playful take on classic butter cookies, the swirling technique is inspired by marbled cakes and pastries that have been popular in European and American baking for generations. The eye-catching design taps into a long tradition of artistic baking where looks are just as important as flavor.
 Pin it
Enjoy these cookies as both a delicious treat and a delightful conversation piece!
Frequently Asked Questions
- → How do I achieve the zebra swirl pattern?
Layer vanilla and chocolate dough alternately, then swirl gently with a toothpick or skewer to create stripes.
- → Why chill the dough before baking?
Chilling keeps the cookies from spreading, holding the distinct zebra pattern and ensuring tender texture.
- → What’s the best way to keep cookies soft?
Store in an airtight container with a slice of bread; it helps retain moisture and keeps cookies soft for days.
- → Can I use different types of cocoa powder?
Natural or Dutch-process cocoa both work, though Dutch-process will give a deeper color and smoother chocolate flavor.
- → How do I know when the cookies are done?
Bake until the edges are set but the centers look slightly soft; they’ll continue to cook as they cool.
- → Is it possible to freeze the dough?
Yes, shape and freeze the dough for up to a month for easy baking whenever you crave fresh cookies.