
 Pin it
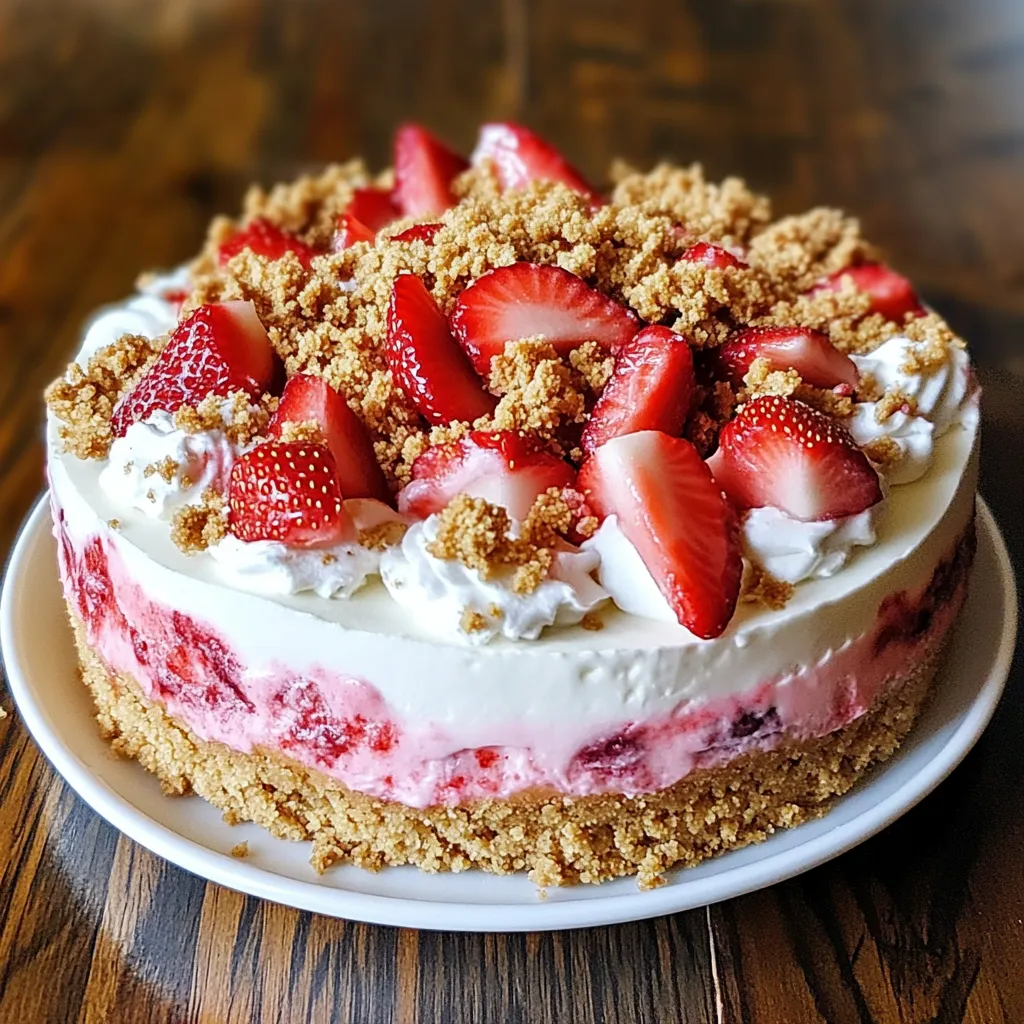
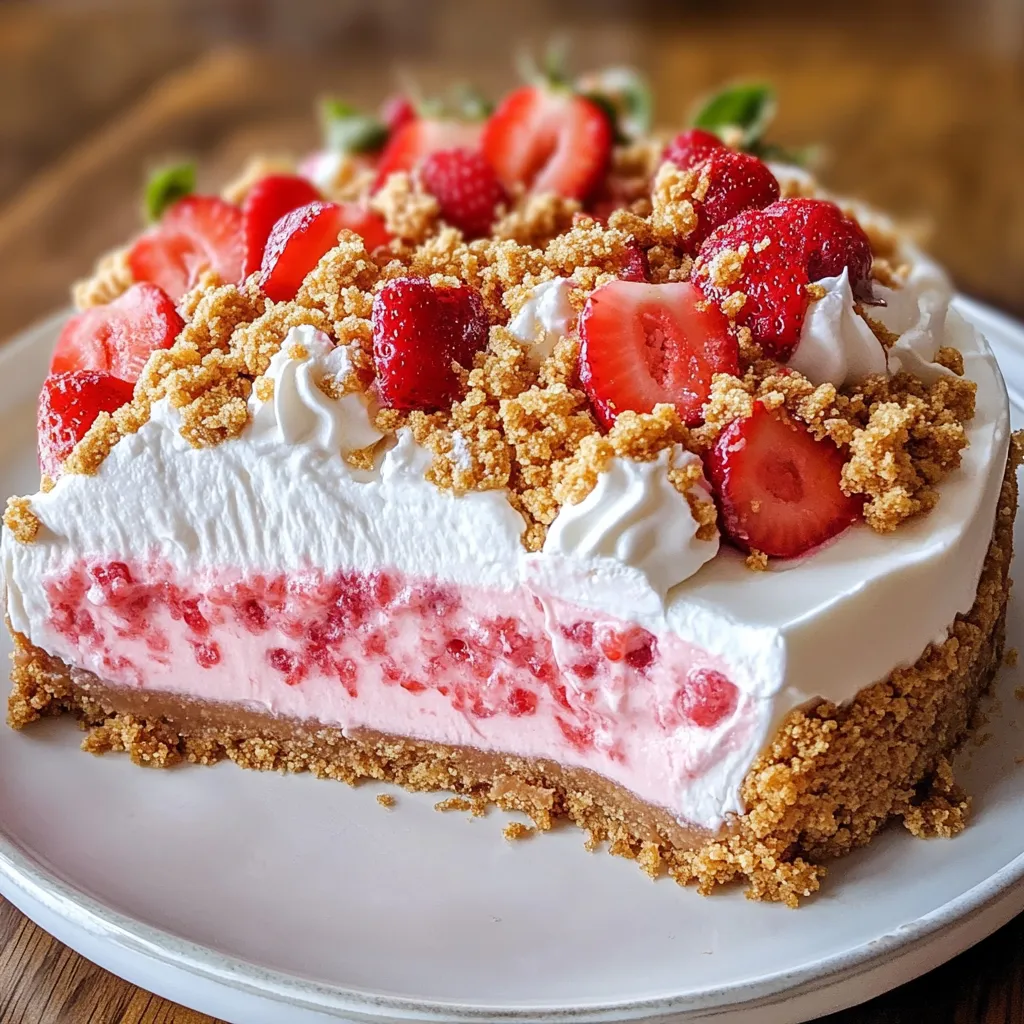
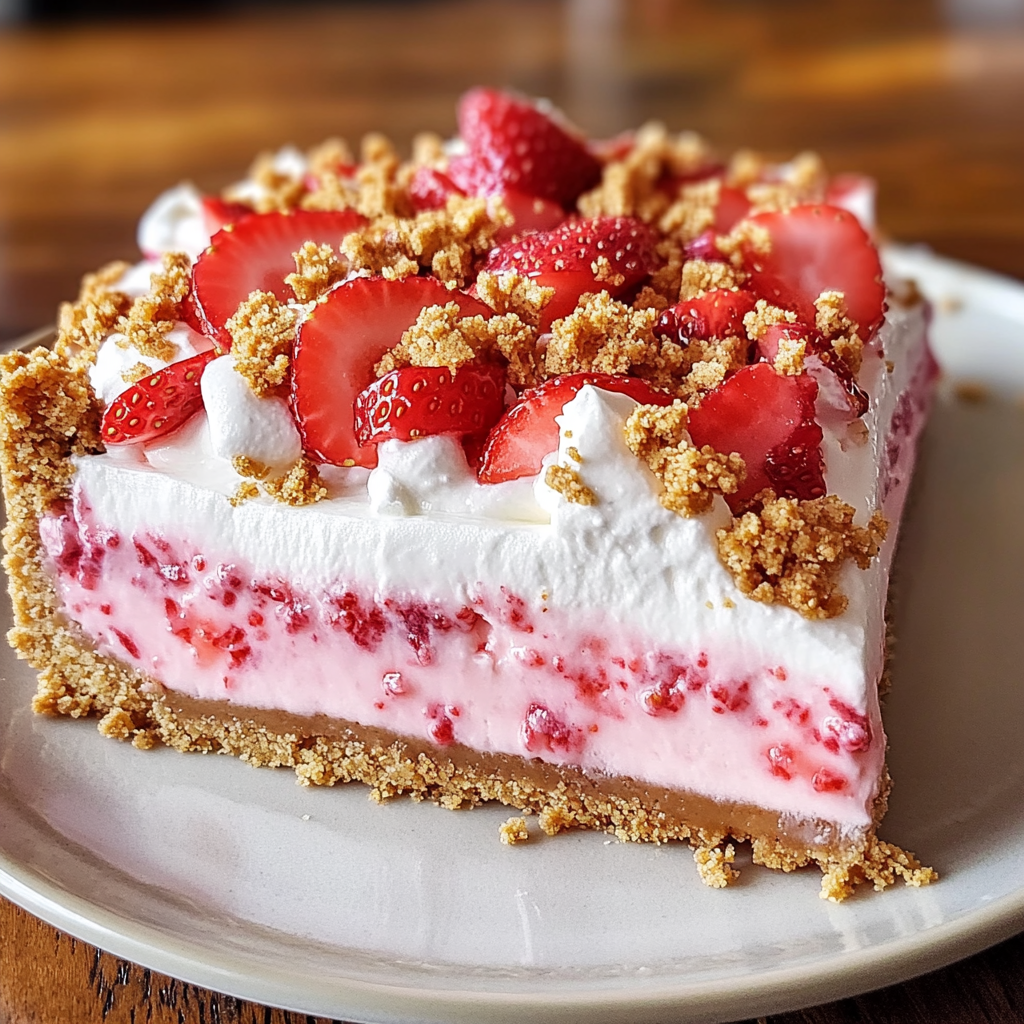
A perfect slice of strawberry crunch cheesecake reveals layers of creamy indulgence topped with a nostalgic crumbly coating that takes you back to childhood ice cream treats. This show-stopping dessert marries the smooth, velvety texture of classic cheesecake with bursts of fresh strawberry flavor and a satisfying buttery crunch. Each bite delivers an enchanting combination of textures and tastes that transform an ordinary dessert into an extraordinary experience.
I discovered this recipe while attempting to recreate my grandmother's favorite strawberry shortcake cookies in cheesecake form. The moment of inspiration came when I sprinkled the first batch of crunch topping over the smooth surface, watching it create a beautiful pattern that promised delicious texture in every bite.
Selecting Your Ingredients
- Farm-Fresh Strawberries: Naturally sweet and bursting with vibrant color, perfect for enhancing flavor and presentation.
- Premium Cream Cheese: Delivers the smoothest, richest texture, ensuring a creamy and luxurious consistency.
- Golden Oreos: Provide a buttery crunch, creating a flavorful and sturdy base for desserts.
- Freeze-Dried Strawberries: Concentrate the berry flavor, adding an extra punch of natural sweetness.
- Heavy Cream: Full-fat ensures proper whipping, creating a light and airy texture in fillings or toppings.
- Pure Vanilla Extract: Brings warmth and depth, tying all the flavors together harmoniously.
- European-Style Butter: High in butterfat, offering the richest and creamiest results for a decadent finish.
Creating Your Perfect Cheesecake
- Foundation Building:
- Begin with a precisely measured crust that combines graham cracker crumbs with melted butter until it reaches the perfect sandy texture.
- Filling Development:
- Whip your cream cheese mixture until perfectly smooth, ensuring no lumps remain for the silkiest texture.
- Strawberry Integration:
- Carefully fold fresh strawberry pieces and gelatin into half the mixture, creating beautiful pink swirls.
- Topping Creation:
- Combine your crunch elements with melted butter until they form perfect clusters.
- Final Assembly:
- Layer your components thoughtfully, ending with an even distribution of the signature crunch topping.
My family particularly loves helping create the crunch topping. My son has become our official taste tester, ensuring the perfect balance of strawberry and cookie crumbs every time we make this cherished recipe.
Perfect Serving Suggestions
Present your masterpiece on a revolving cake stand, garnished with fresh strawberry fans and delicate whipped cream rosettes. For special occasions, create a dessert bar with various sauce options like white chocolate, caramel, and fresh strawberry compote. Consider serving smaller portions in elegant glass dishes for dinner parties.
 Pin it
Creative Variations
Transform this dessert by adding a layer of dark chocolate ganache beneath the strawberry layer. Create a tropical version using mango and passion fruit with coconut crunch topping. For chocolate lovers, incorporate cocoa powder into the crunch mixture and drizzle with chocolate sauce.
Storage Excellence
Store your cheesecake in a covered springform pan in the refrigerator, where it maintains perfect texture for up to four days. For freezing, wrap individual slices in plastic wrap then foil, removing as much air as possible. Thaw overnight in the refrigerator for best results.
After countless iterations of this recipe, I've found that patience is key to achieving the perfect texture. The time invested in properly chilling and setting the cheesecake pays off in the most incredible, silky-smooth result.
Temperature Mastery
Understanding the proper temperature progression is crucial. Start with room temperature ingredients, chill thoroughly, and serve slightly cool but not cold for the best flavor and texture experience.
Seasonal Adaptations
During peak strawberry season, use local berries for the most intense flavor. In winter months, enhance store-bought strawberries by macerating them with a touch of sugar before use. Consider creating special holiday versions with themed decorations and color variations.
Troubleshooting Solutions
If your filling seems too soft, chill it briefly before adding the topping. For a crunch topping that's too dry, add small amounts of melted butter until it reaches the perfect consistency. If your crust crumbles, press it more firmly and chill before filling.
 Pin it
Final Professional Thoughts
This strawberry crunch cheesecake represents the perfect marriage of textures and flavors. The combination of smooth, creamy filling and crispy, flavorful topping creates an unforgettable dessert experience that turns any gathering into a celebration. The joy of watching guests discover the different layers and textures makes this recipe a true treasure in my collection.
Frequently Asked Questions
- → Do I need to bake this cheesecake?
- No baking needed! Just chill in the fridge for at least 4 hours or until firm. The filling will set up perfectly without any baking.
- → How long does the cheesecake stay fresh?
- Store in the fridge for up to 5 days. The crunchy topping stays crisp since it's added after the cheesecake is set.
- → Can I make this ahead of time?
- Yes, make the cheesecake up to 2 days ahead. Add the crunch topping and fresh strawberries just before serving.
- → Where can I find freeze-dried strawberries?
- Most grocery stores carry freeze-dried strawberries in the snack aisle or with dried fruits. You can also find them online.
- → What if my cheesecake isn't firm enough?
- Pop it in the freezer for 30 minutes to help it firm up quickly. Just don't freeze it solid or the texture will change.