
 Pin it
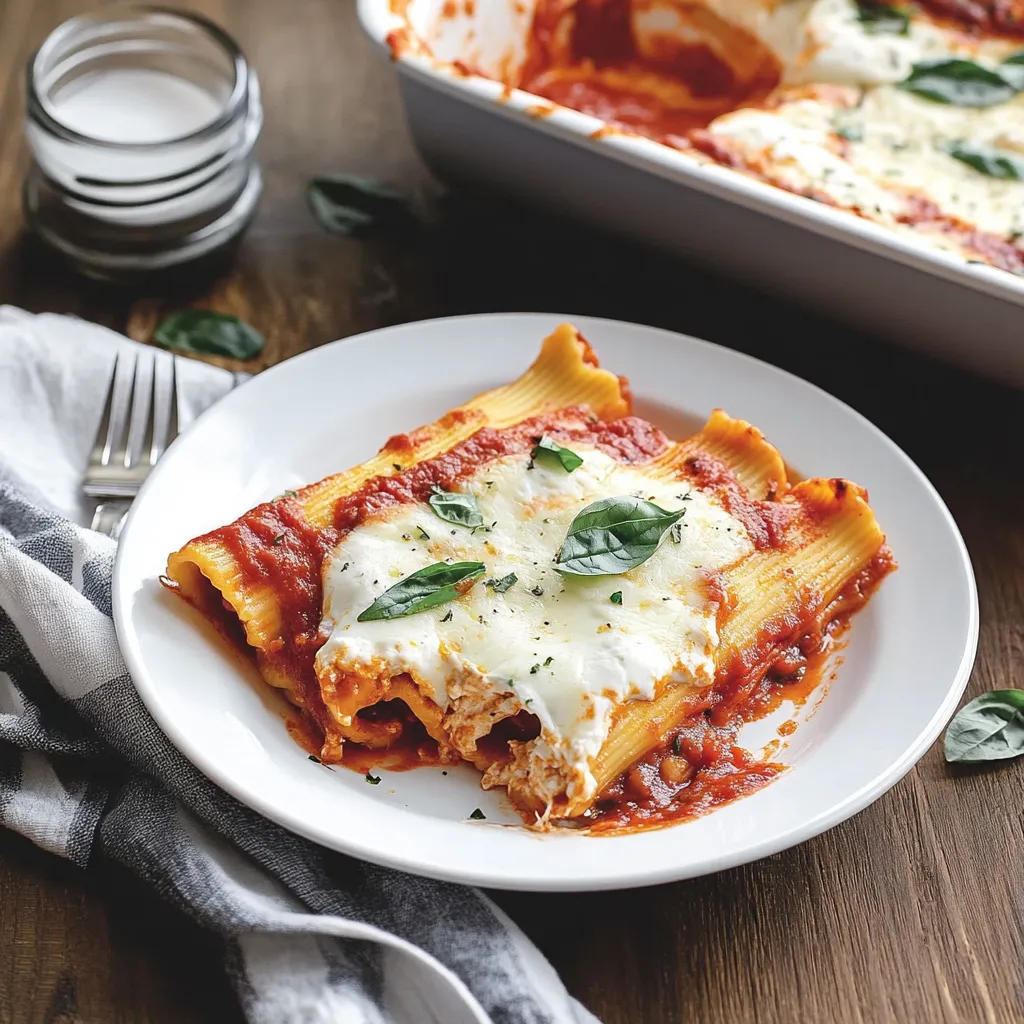
The aroma of bubbling marinara sauce and melting cheese fills my kitchen every time I make this classic manicotti. It's one of those dishes that transforms ordinary ingredients into something extraordinary. Each pasta tube, carefully filled with a cloud-like ricotta mixture and nestled in bright tomato sauce, creates a meal that feels special enough for celebrations yet simple enough for Sunday dinner.
The first time I served this manicotti at a family gathering, my Italian grandmother nodded in approval – a moment I'll never forget. Now it's become my go-to dish for special occasions and comfort food cravings alike.
Essential Ingredients for Perfect Manicotti
- Fresh whole milk ricotta: Creates the creamiest filling.
- Quality mozzarella: Adds that perfect melty stretch.
- Freshly grated Parmesan: Brings nutty depth.
- Manicotti shells: Should be cooked just shy of al dente.
- Fresh parsley: Adds color and fresh flavor.
- Lemon zest: Brightens all the flavors.
- Egg yolks: Bind the filling perfectly.
- Your favorite marinara sauce: Ties it all together.
Creating Your Perfect Manicotti
- The Art of Pasta:
- Start by bringing a large pot of generously salted water to a boil. The key here is to slightly undercook your manicotti shells – about one minute less than the package directs. They'll finish cooking in the oven, preventing them from becoming too soft. Once cooked, carefully rinse under cold water to stop the cooking process and make them easier to handle.
- Crafting the Perfect Filling:
- In a large bowl, combine your ricotta, half the mozzarella, egg yolks, Parmesan, and seasonings. The secret to an exceptional filling is taking time to mix until everything is perfectly combined. The lemon zest might seem unusual, but trust me – it adds a brightness that makes the cheese filling sing.
- The Art of Assembly:
- Here's where patience makes perfect. Pour a cup of marinara sauce into your baking dish, creating a protective bed for your manicotti. Now comes my favorite trick for filling the pasta: instead of struggling with spoons, pipe the filling using a large plastic bag with the corner snipped off. Fill each tube from both ends to ensure every bite contains the perfect amount of creamy filling.
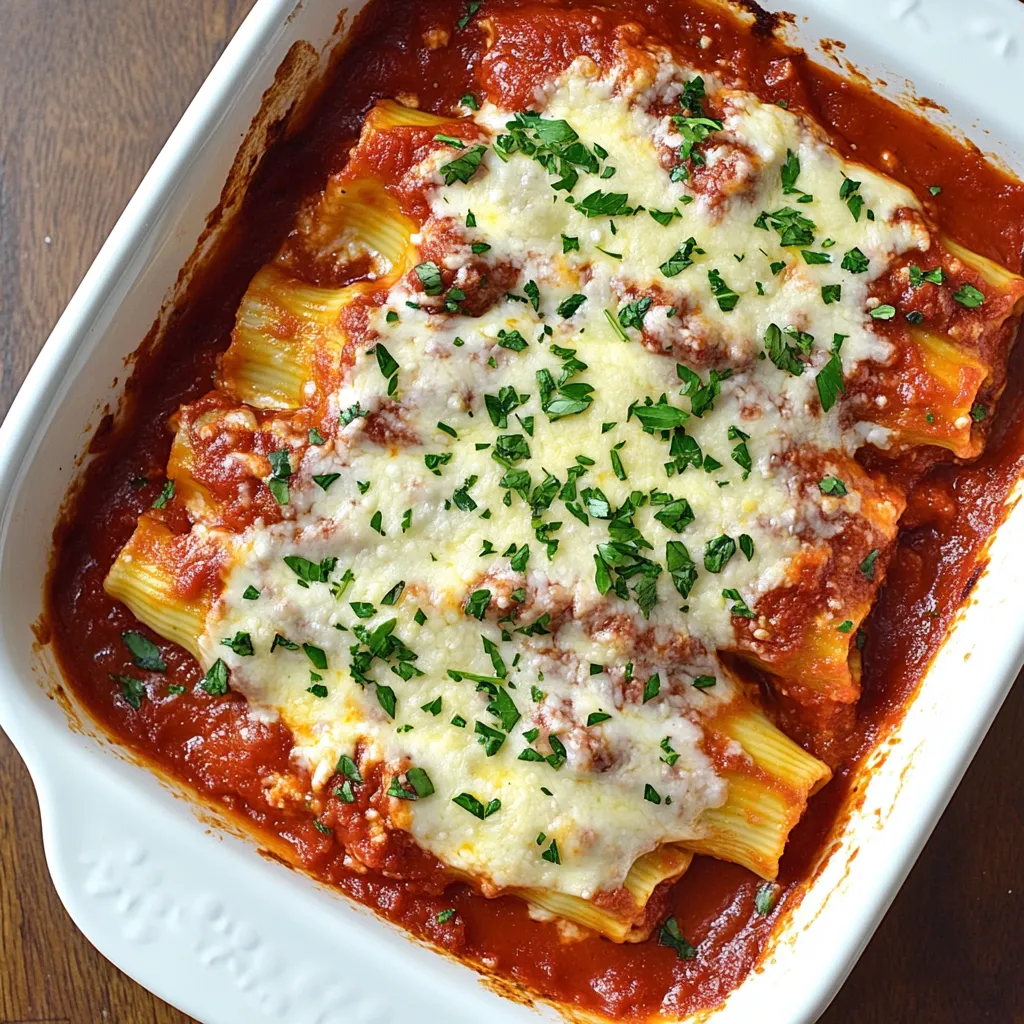
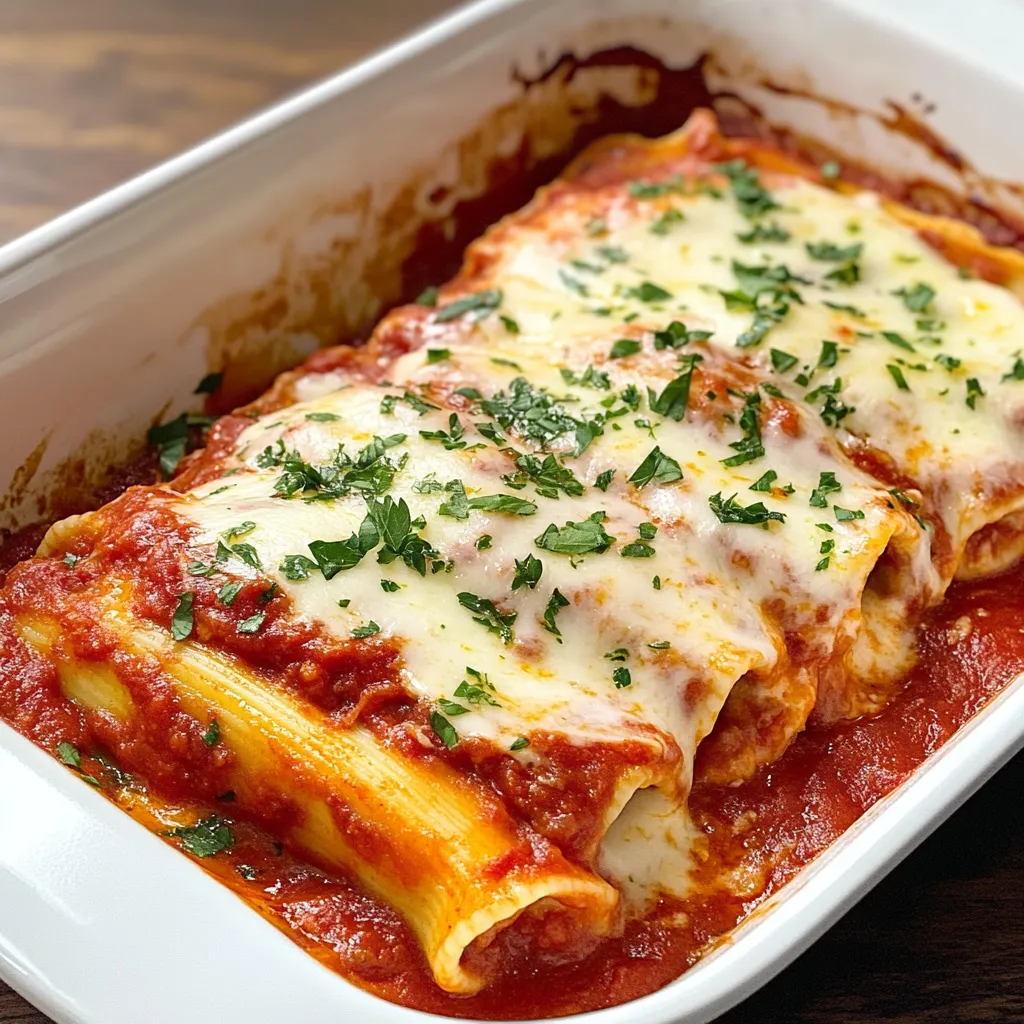
- Creating Layers of Flavor:
- Arrange your filled manicotti in the dish like sleeping soldiers, each one nestled next to its neighbors but not too tightly packed. Cover them with the remaining marinara sauce, making sure every pasta tube is well-coated. The sauce protects the pasta while baking and creates that beautiful bubbling surface we're looking for.
My grandmother always said the secret to perfect manicotti is love and patience. While I used to roll my eyes at this advice, I've learned she was right. Taking time with each step ensures a dish that's worthy of any celebration.
 Pin it
Perfect Timing and Temperature
Cover your assembled dish first with parchment (to prevent the cheese from sticking) and then with foil. Bake at 350°F (175°C) for 35 minutes, then uncover and bake for another 15 minutes until the cheese is golden and the sauce is bubbling around the edges. That final uncovered bake creates those irresistible crispy cheese spots.
Make-Ahead Magic
One of the best things about manicotti is how well it works for entertaining. You can assemble the entire dish up to 24 hours ahead and refrigerate. Just add an extra 10-15 minutes to the covered baking time if cooking from cold. For longer storage, freeze the unbaked dish for up to three months.
Seasonal Variations
While classic cheese filling is always a winner, this recipe adapts beautifully to different seasons. In spring, add fresh basil and spinach to the filling. Summer calls for roasted vegetables in the sauce. Fall welcomes sage and butternut squash, while winter is perfect for adding caramelized onions and roasted garlic.
Troubleshooting Tips
If your filling seems too wet, add more Parmesan cheese. If the pasta tears, don't worry – just place it seam-side down in the dish. If the top starts browning too quickly during the uncovered bake, tent loosely with foil. Remember, even imperfect manicotti tastes delicious.
 Pin it
This cheese-stuffed manicotti has become more than just a recipe in my kitchen – it's a way to show love through food. Whether I'm making it for a quiet family dinner or a special celebration, it never fails to bring people together. The best part? Watching faces light up with that first perfect bite, knowing I've created something that will become part of their own food memories.
Frequently Asked Questions
- → Can I make manicotti ahead of time?
- Yes, assemble up to 24 hours ahead and refrigerate. You can also freeze it for up to 3 months before or after baking.
- → How do I prevent the shells from breaking?
- Cook them 1 minute less than package directions and handle gently. Cook extra shells as some may break during boiling.
- → Can I use fresh pasta instead of shells?
- Yes, use fresh pasta sheets cut into 4-inch squares. Briefly boil for 30 seconds, then fill and roll into tubes.
- → Why cover with parchment and foil?
- The parchment prevents the cheese from sticking to the foil while baking, keeping your topping intact.
- → How long do leftovers last?
- Store in the fridge for up to 3 days. Reheat covered in the oven until heated through.