Easy Sourdough Focaccia Bread

Featured in: Freshly Baked Goodness

This Easy Sourdough Focaccia Recipe transforms simple ingredients into a rustic Italian bread with incredible texture and flavor. The slow fermentation process creates a soft, airy interior and deliciously crispy exterior that's impossible to resist. What makes this recipe special is the balance between simplicity and technique - though it requires patience through the overnight fermentation, the actual hands-on work is minimal. The signature dimpled surface, created by pressing oiled fingers into the dough, captures pools of olive oil and provides the perfect spots for pressing in Kalamata olives and fresh rosemary. Finished with flaky sea salt, this focaccia makes an impressive addition to any meal, whether served alongside soup, used for sandwiches, or simply enjoyed on its own with a drizzle of quality olive oil.
A smiling woman in an apron poses for a selfie in a professional kitchen.
Updated on Sat, 08 Mar 2025 18:20:27 GMT
A pan of food with olives and herbs. Pin it
A pan of food with olives and herbs. | tastygusto.com

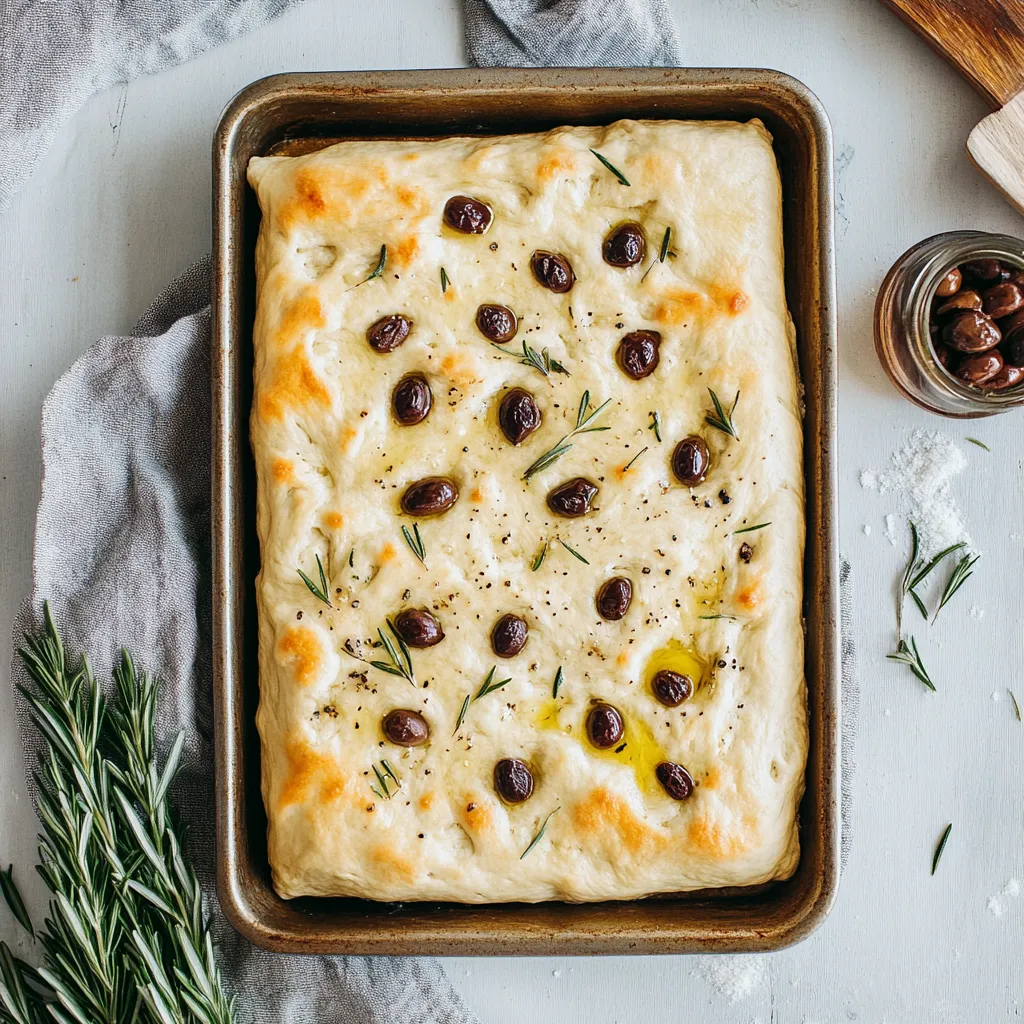
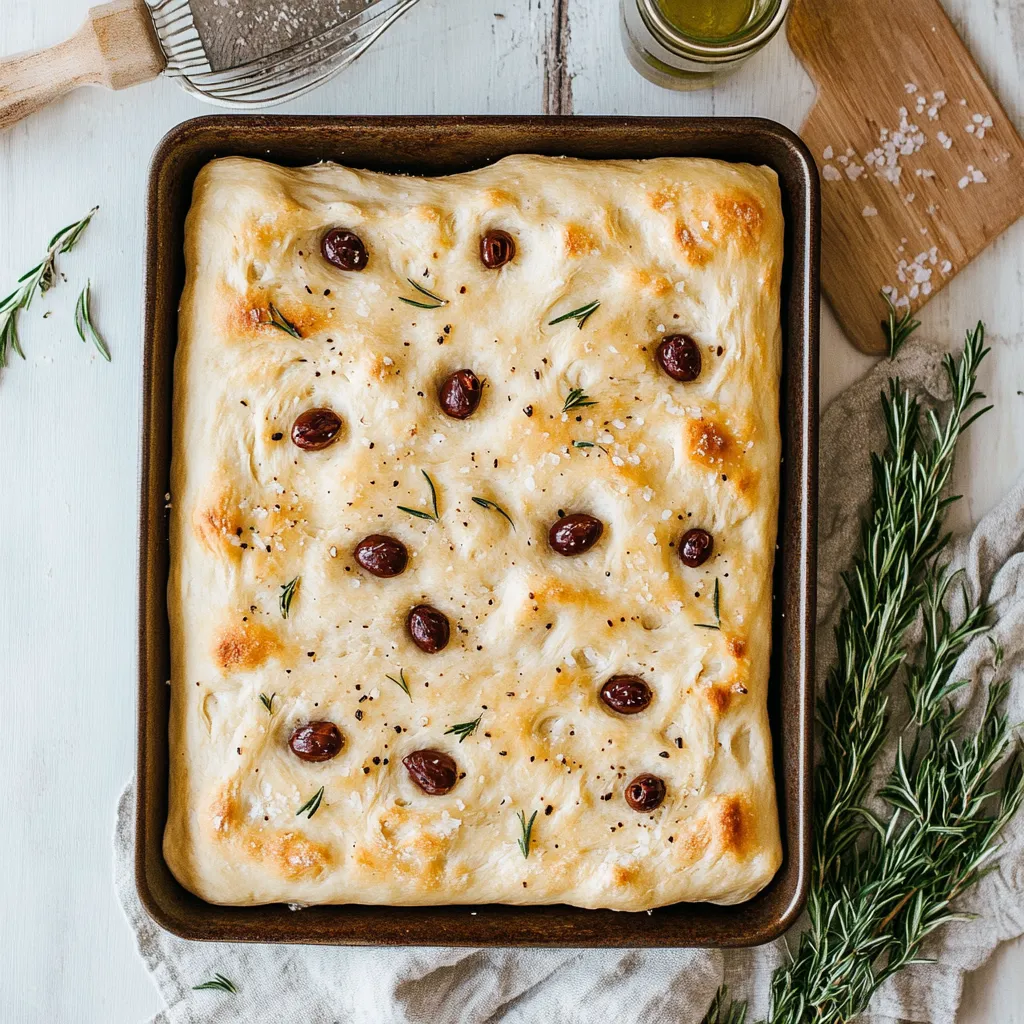
Sourdough focaccia combines rustic Italian tradition with the complex flavor development of natural fermentation to create an irresistible flatbread experience. This version features a remarkably light interior structure with countless tiny air pockets surrounded by a gloriously crispy exterior that shatters slightly with each bite. The generous use of quality olive oil creates that signature golden crust while infusing the bread with rich flavor. This deceptively simple bread embodies perfect textural contrast—crunchy edges giving way to a pillowy interior that melts in your mouth.

I made this focaccia for a family gathering last summer, serving it alongside a selection of Mediterranean dips. My brother-in-law, who typically avoids bread, took three slices and asked for the recipe before leaving. Even my mother, who claims she can never get sourdough right, succeeded beautifully with this method on her first attempt.

Ingredient Quality Matters

  • Flour: Choose bread flour or all-purpose flour with at least 11% protein content for proper structure development. Lower protein flours will produce a denser result with fewer air pockets.
  • Water: The approximately 87% hydration creates challenge but rewards with exceptional texture. Use filtered water if your tap water has strong chlorine flavor.
  • Sourdough Starter: Your starter should be at peak activity, ideally used 4 to 6 hours after feeding when it has doubled but not yet collapsed for maximum leavening power.
  • Olive Oil: Select a high-quality extra virgin olive oil as its flavor will significantly impact the final bread. The oil serves multiple purposes from flavoring to creating the signature crust.
  • Salt: Both fine sea salt in the dough and flaky finishing salt on top are essential. The internal salt strengthens gluten and enhances flavor while the flaky topping adds texture and bursts of salinity.

Creating Perfect Texture

Starter Activation Process:
Begin by ensuring your sourdough starter is properly fed and active. Mix 25g of existing starter with 50g flour and 50g water, creating a 1:2:2 ratio that promotes vigorous growth. Allow this mixture to develop at room temperature until it has doubled in size and shows abundant bubbles throughout. This typically takes between 4 and 8 hours depending on ambient temperature and starter strength.
Gentle Dough Development:
Combine your water and active starter in a large bowl, whisking until the starter is fully dispersed throughout the liquid. Add your flour and salt, mixing initially with a spatula until no dry flour remains. Perform four sets of stretch and folds spaced thirty minutes apart. Each set consists of grasping the dough from underneath, stretching it upward until resistance is felt, then folding it over itself. Rotate the bowl and repeat this process four to five times per set. Over time, the dough gains strength and elasticity.
Flavor Development Through Cold Fermentation:
After the final stretch and fold, allow the dough to continue fermenting at room temperature until you notice bubble formation on the surface and a slight increase in volume. Transfer this partially fermented dough to an airtight container and refrigerate overnight or up to 24 hours. This cold fermentation slows yeast activity while allowing beneficial bacteria to continue producing flavor compounds.
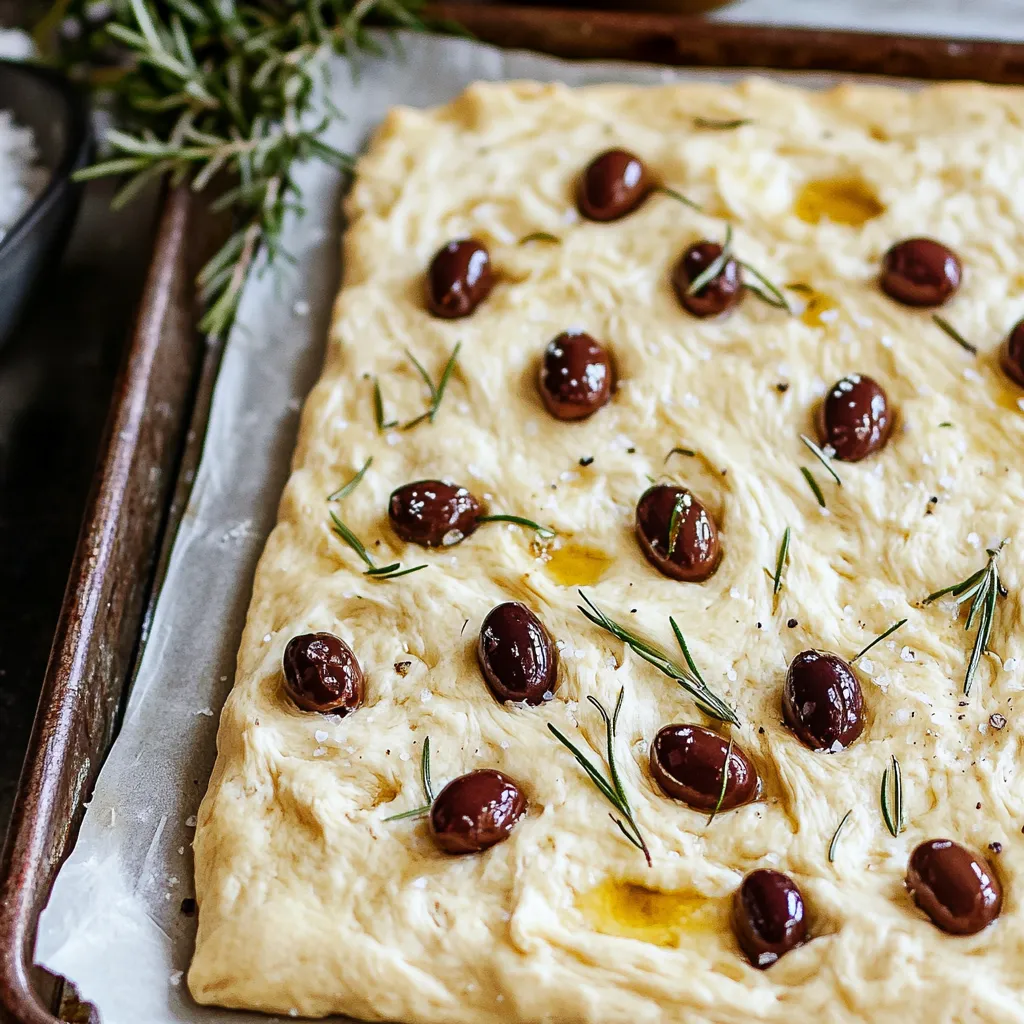
Dimpling Technique Perfection:
After the dough has completed its second rise in the pan and appears puffy and jiggly, create the signature focaccia texture by pressing your oiled fingertips deeply into the dough. These indentations should nearly reach the bottom of the pan without tearing through the dough. The olive oil pools in these dimples, frying portions of the dough during baking while also creating reservoirs for herbs and toppings to collect.
A square pan of food with olives and herbs. Pin it
A square pan of food with olives and herbs. | tastygusto.com

My grandmother taught me that properly made focaccia should have what Italians call 'alveoli'—those beautiful irregular air pockets throughout the crumb. She would hold slices up to the light to inspect them, declaring success only when she could see light passing through the largest holes. Her secret was always allowing ample time for both fermentation stages without rushing the process.

Serving Inspirations

Present your freshly baked focaccia while still slightly warm for maximum textural contrast. Cut into generous squares and arrange on a wooden board alongside small bowls of additional olive oil infused with fresh herbs for dipping. For an elevated appetizer, top warm focaccia with paper-thin prosciutto, fresh arugula, and shaved Parmesan. Create exceptional sandwiches by slicing horizontally and filling with Mediterranean-inspired ingredients like roasted red peppers, fresh mozzarella, and basil.

Proper Storage

Store completely cooled focaccia in a paper bag at room temperature for up to two days to maintain optimal texture. For longer storage, wrap tightly in plastic and freeze for up to one month. Refresh room temperature bread by warming in a 350°F oven for 5 minutes. Frozen focaccia should be thawed at room temperature then reheated for 8 to 10 minutes to restore crispness. Avoid refrigerating focaccia as this accelerates staling. If texture has diminished, transform leftovers into croutons by cutting into cubes and toasting with additional olive oil and herbs.

A pizza with olives and herbs on it. Pin it
A pizza with olives and herbs on it. | tastygusto.com

Frequently Asked Questions

→ Can I use commercial yeast instead of sourdough starter?
This recipe is specifically designed for sourdough, which gives it that distinctive flavor and texture. If you don't have a starter, consider finding a traditional focaccia recipe with commercial yeast instead, as the techniques and timing would need significant adjustments.
→ Why is my focaccia dough so sticky?
Focaccia dough is naturally wetter and stickier than many bread doughs - this high hydration is what creates those beautiful air pockets. Don't add extra flour; instead, use olive oil on your hands when handling the dough and trust that it will come together during the folding and fermentation process.
→ Can I make this focaccia in a different sized pan?
Yes! You can adjust to different pans - a smaller pan will yield a thicker focaccia, while a larger one makes a thinner bread. For a round focaccia, use a 10-inch cake pan. Just watch the baking time, as thicker focaccia may need a few extra minutes while thinner ones will bake faster.
→ What other toppings can I use on focaccia?
Focaccia is incredibly versatile! Try thinly sliced tomatoes, caramelized onions, roasted garlic, sun-dried tomatoes, different herbs like thyme or oregano, or even thinly sliced potato. Just make sure any fresh vegetables aren't too wet, or they might make your focaccia soggy.
→ How do I store leftover focaccia?
Store cooled focaccia at room temperature, wrapped in a clean kitchen towel or in an airtight container, for up to 2 days. For longer storage, slice and freeze it for up to 3 months. Refresh room temperature focaccia by warming it in a 350°F oven for 5-10 minutes before serving.

Easy Sourdough Focaccia Bread

This Easy Sourdough Focaccia Recipe creates a rustic Italian bread with a crispy exterior and pillowy interior, topped with olives and fresh rosemary.

Prep Time
25 Minutes
Cook Time
25 Minutes
Total Time
50 Minutes


Difficulty: Intermediate

Cuisine: Italian

Yield: 10 Servings (One 9x13-inch focaccia)

Dietary: Vegan, Vegetarian, Dairy-Free

Ingredients

→ For the Sourdough Starter

01 25g (1¾ tablespoons) active sourdough starter
02 50g (7 tablespoons) all-purpose flour
03 50g (3½ tablespoons) water, room temperature

→ For the Dough

04 500g (4 cups) all-purpose or bread flour
05 430g (1¾ cups + ½ tablespoon) water
06 All of your prepared sourdough starter
07 8g (1½ teaspoons) salt

→ For the Toppings

08 ¼ cup extra virgin olive oil, plus more for drizzling
09 ½ cup Kalamata olives, pitted and sliced
10 2 tablespoons fresh rosemary leaves
11 1-2 teaspoons flaky sea salt

Instructions

Step 01

Either the morning or evening before baking day, feed your sourdough starter and let it rise until it's doubled in size and looking bubbly and active. If you're feeding it overnight, use a bit less starter and more flour and water (like 20g starter to 60g flour and 60g water) to slow down the rise so it doesn't collapse by morning.

Step 02

In a large bowl, combine the water and active sourdough starter, stirring to break up the starter. Add the flour and salt, then use a rubber spatula or wooden spoon to mix everything together until you have a wet, shaggy dough with no dry flour remaining. It'll look rough at this stage - that's exactly right!

Step 03

Over the next 2 hours, you'll perform 4 sets of stretch and folds, one every 30 minutes. For each set, grab one side of the dough, stretch it up and fold it over itself. Turn the bowl a quarter turn and repeat. Keep turning and folding until you've worked your way around the entire dough ball. Cover the bowl with a damp kitchen towel between sets to prevent the dough from drying out. The first set will be messy and the dough might tear, but it'll get smoother and stronger with each set.

Step 04

After your final stretch and fold, let the dough rise at room temperature for 2-4 hours, until you see lots of bubbles forming - that's fermentation happening! The exact timing depends on how warm your kitchen is. If your space is cool, you might need to let it sit longer, or create a warm spot by placing a mug of hot water in a turned-off oven alongside the dough.

Step 05

Transfer the dough to an airtight container or cover your bowl tightly with plastic wrap. Pop it in the refrigerator overnight, or for up to 36 hours if you want an extra tangy flavor from a longer ferment. This slow, cold rise is where all the wonderful sourdough flavor develops.

Step 06

When you're ready to bake, pour a generous glug of olive oil into a 9x13-inch baking pan. If you're worried about sticking, you can line the pan with parchment paper first, then add the oil. Take your cold dough from the fridge and plop it into the oiled pan. Let it rest for about 10 minutes to relax the gluten, then oil your fingertips and begin gently pressing and stretching the dough toward the edges of the pan. If it keeps springing back, give it another short rest and try again - don't force it.

Step 07

Find a warm spot in your kitchen and let the focaccia dough rise until it's puffy and jiggly when you gently shake the pan. This typically takes 3-5 hours depending on the temperature. Either cover the dough with a damp cloth or brush the surface with olive oil to prevent it from drying out during this rise.

Step 08

Preheat your oven to 450°F (230°C). When it's hot and your dough is puffy, drizzle a little more olive oil over the surface. Dip your fingers in oil and press them deeply into the dough to create the signature focaccia dimples all over the entire surface. Really push down to the bottom of the pan!

Step 09

Press your sliced Kalamata olives deeply into the dimpled dough. Scatter fresh rosemary leaves across the surface, gently pressing them in. Finish with a generous sprinkle of flaky sea salt.

Step 10

Slide your pan into the hot oven and bake for 25-30 minutes until the focaccia is deeply golden brown on top and has pulled away slightly from the edges of the pan. If the top is browning too quickly, loosely cover it with aluminum foil for the remainder of the baking time.

Step 11

Let the focaccia rest in the pan for just 3-4 minutes, then carefully transfer it to a wire cooling rack. Allow it to cool for at least 10-15 minutes before slicing - though it's absolutely divine when still slightly warm!

Notes

  1. This recipe uses US cup measurements, which are smaller than metric cups. For the most accurate results, use a kitchen scale and measure by weight (grams).
  2. The focaccia will keep well at room temperature, wrapped in a clean kitchen towel or stored in an airtight container, for up to 2 days. You can also freeze slices for up to 3 months.
  3. Feel free to switch up the toppings! Cherry tomatoes, thinly sliced onions, roasted garlic, or other herbs like thyme and oregano all work beautifully.
  4. The longer you let your dough cold ferment in the fridge (up to 36 hours), the more complex and tangy your sourdough flavor will be.

Tools You'll Need

  • Large mixing bowl
  • Rubber spatula or wooden spoon
  • 9x13-inch baking pan
  • Kitchen scale (recommended for best results)
  • Measuring cups and spoons (if not using a scale)
  • Clean kitchen towel
  • Wire cooling rack

Allergy Information

Please check ingredients for potential allergens and consult a health professional if in doubt.
  • Contains gluten (wheat flour)

Nutrition Facts (Per Serving)

It is important to consider this information as approximate and not to use it as definitive health advice.
  • Calories: 207
  • Total Fat: 1 g
  • Total Carbohydrate: 44 g
  • Protein: 6 g